Skip to content

Version 8.7 · iPhone & iPad

Your classroom.
Step by step.

Plan the room, assign seats and document attendance and oral participation. The current version adds an accessible bottom toolbar, renameable seating plans and a more robust saving system.

All names and rooms shown are fictional examples.
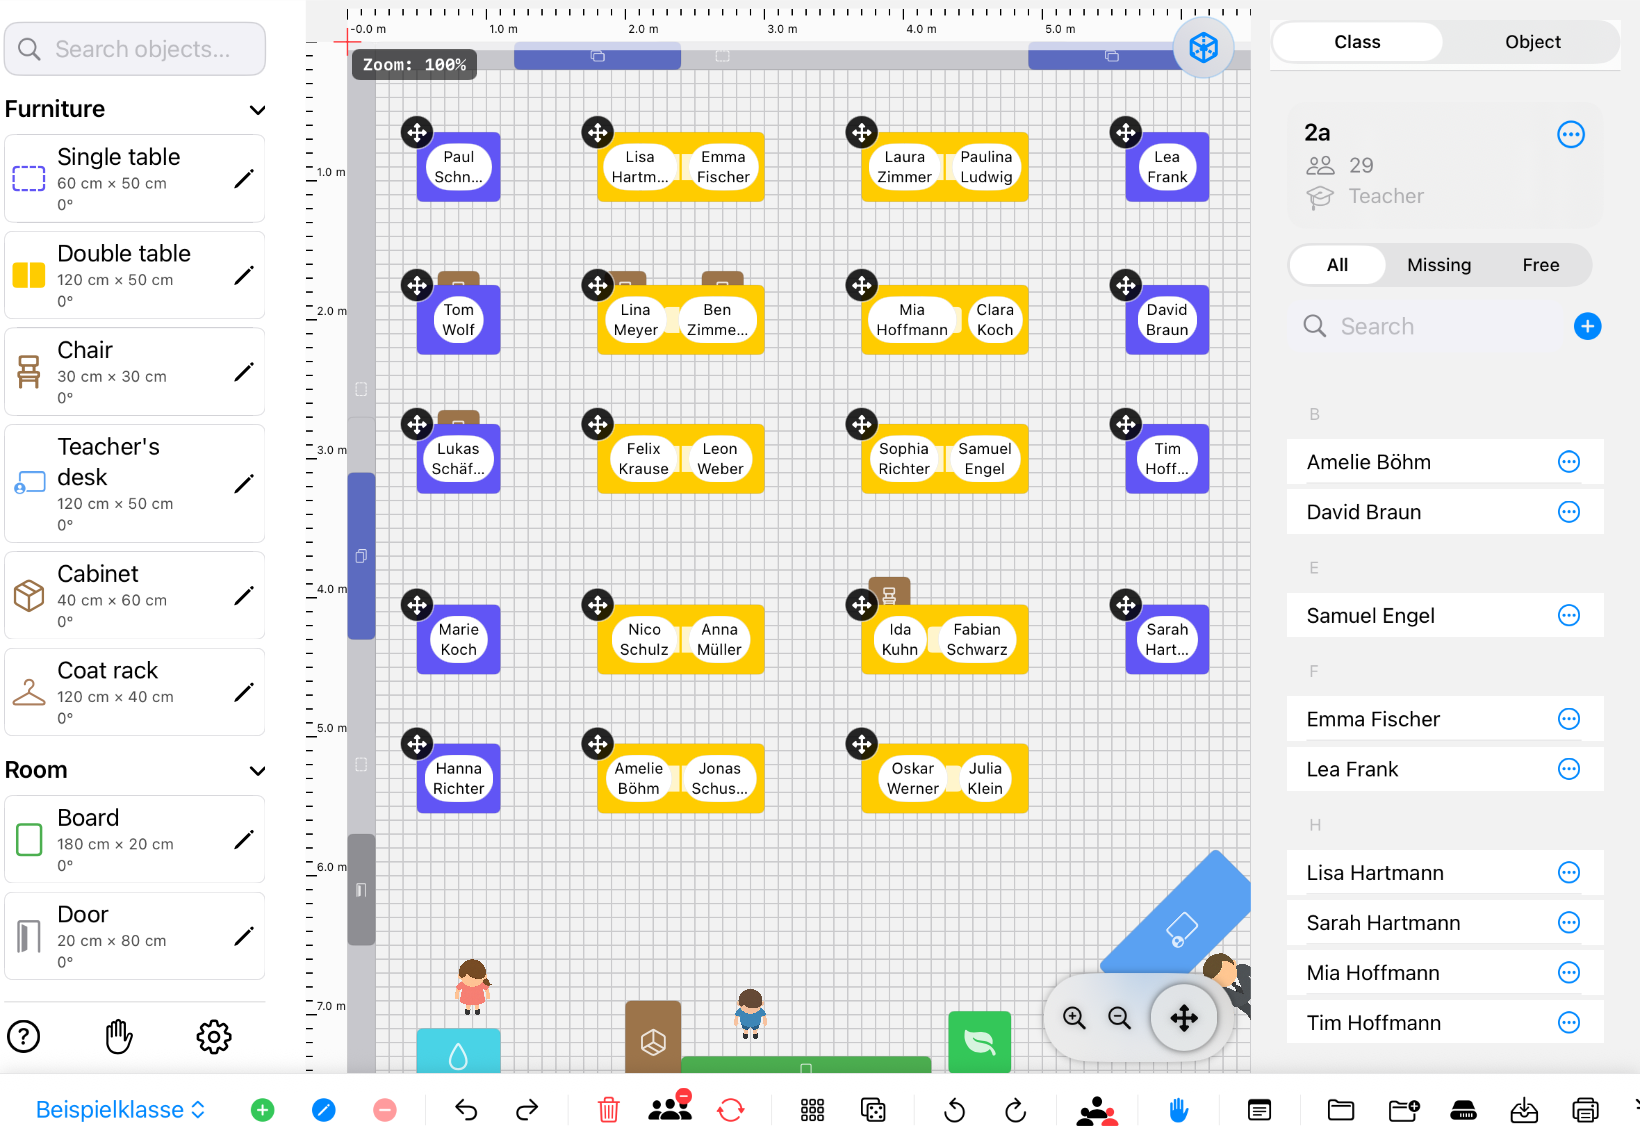
Classroom Planer on an iPad in landscape with a fictional example class
Current iPad screenshot in landscape · Version 8.7

New in version 8.7

Faster controls. Safer saving.

The following steps and screenshots include the key changes in the current app version.

01

Bottom toolbar

Plan selection, Undo, attendance, participation, notes, full screen and the more menu remain within easy reach at the bottom of the screen.

02

Rename seating plans

Use the blue pencil beside the plan selector to give each class and room variation a clear name.

03

Reliable saving

Choose a local or cloud folder, save to the linked file and use the automatically maintained local backup when needed.

On both devices

iPad and iPhone side by side.

On iPad, the palette, canvas, class list and file controls stay visible together. On iPhone, the bottom toolbar keeps the same features compact and accessible.
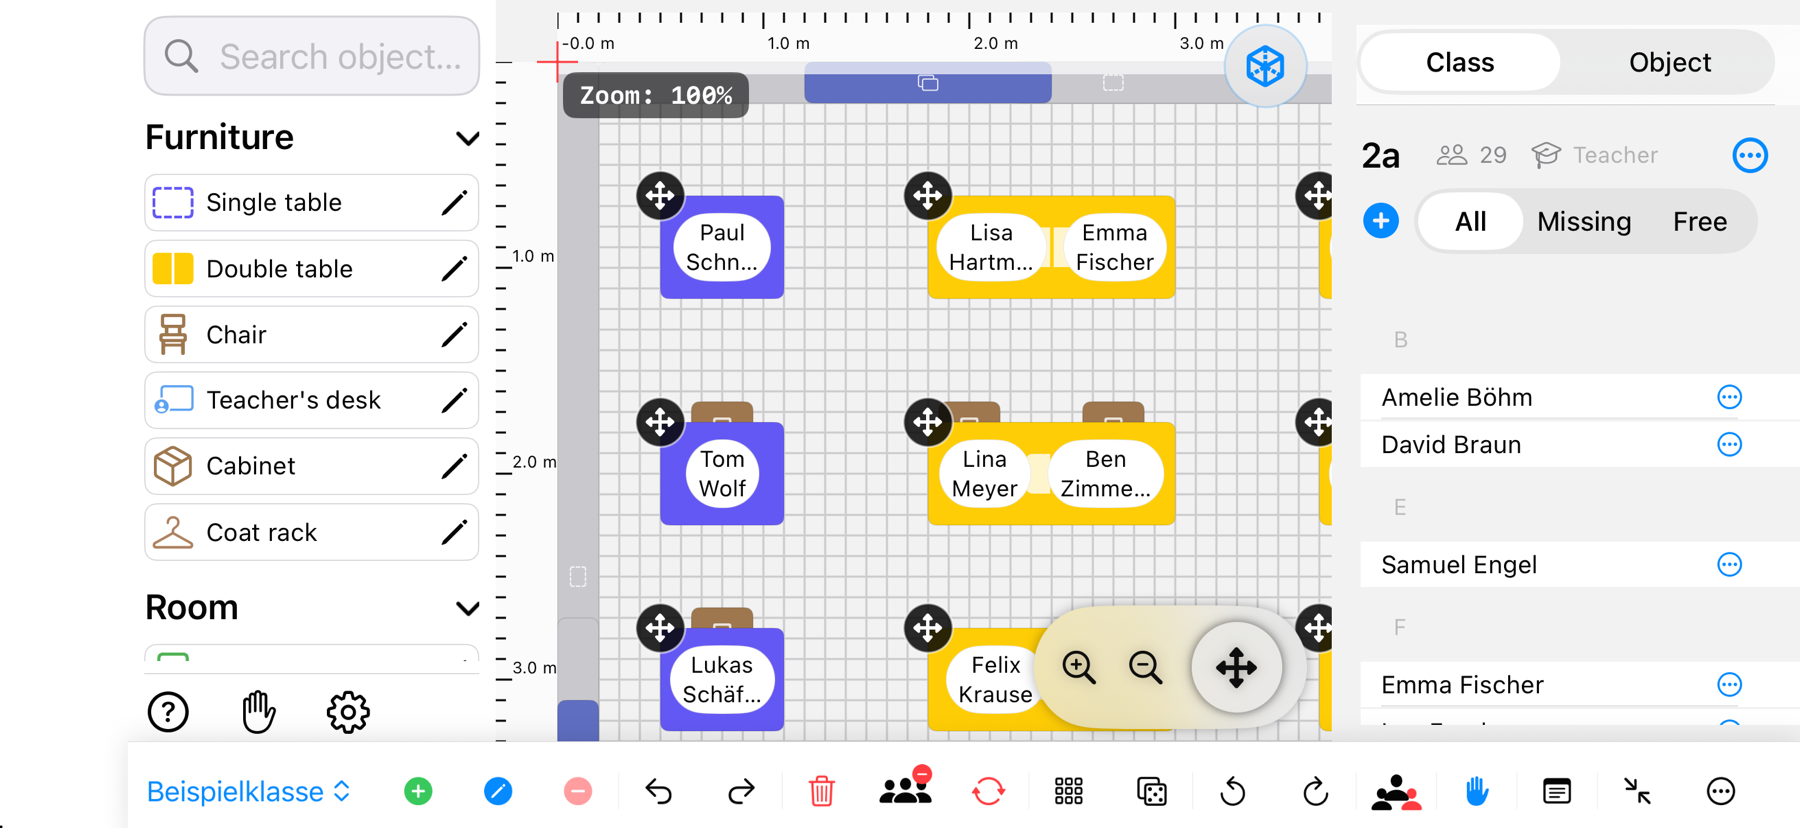
Classroom Planer 8.7 on iPad in landscape
iPadLarge canvas with file controls directly visible
Classroom Planer 8.7 on iPhone in landscape
iPhoneCompact layout with the bottom toolbar

What the app connects

One room, three tasks.

Classroom Planer connects seating plan preparation with recurring tasks during the lesson.

01 / PLAN

Room and seats

Recreate the room on a measured grid. Place furniture, import the class and assign names to available seats.

02 / RECORD

Attendance and notes

Record status for each lesson date, distinguish types of absence and keep ongoing student notes separately.

03 / REVIEW

Oral participation

Assess contributions from 0 to 5, add reasons and review progress across a term or school year.

Detailed guide

From an empty room to the final review.

Eight sections cover the complete workflow. Blue outlines in the images show where to find the feature being explained.

Step 01

Prepare rooms and classes

A fully arranged example class is ready on first launch. Explore it immediately, then create and name a separate seating plan for every group you teach.
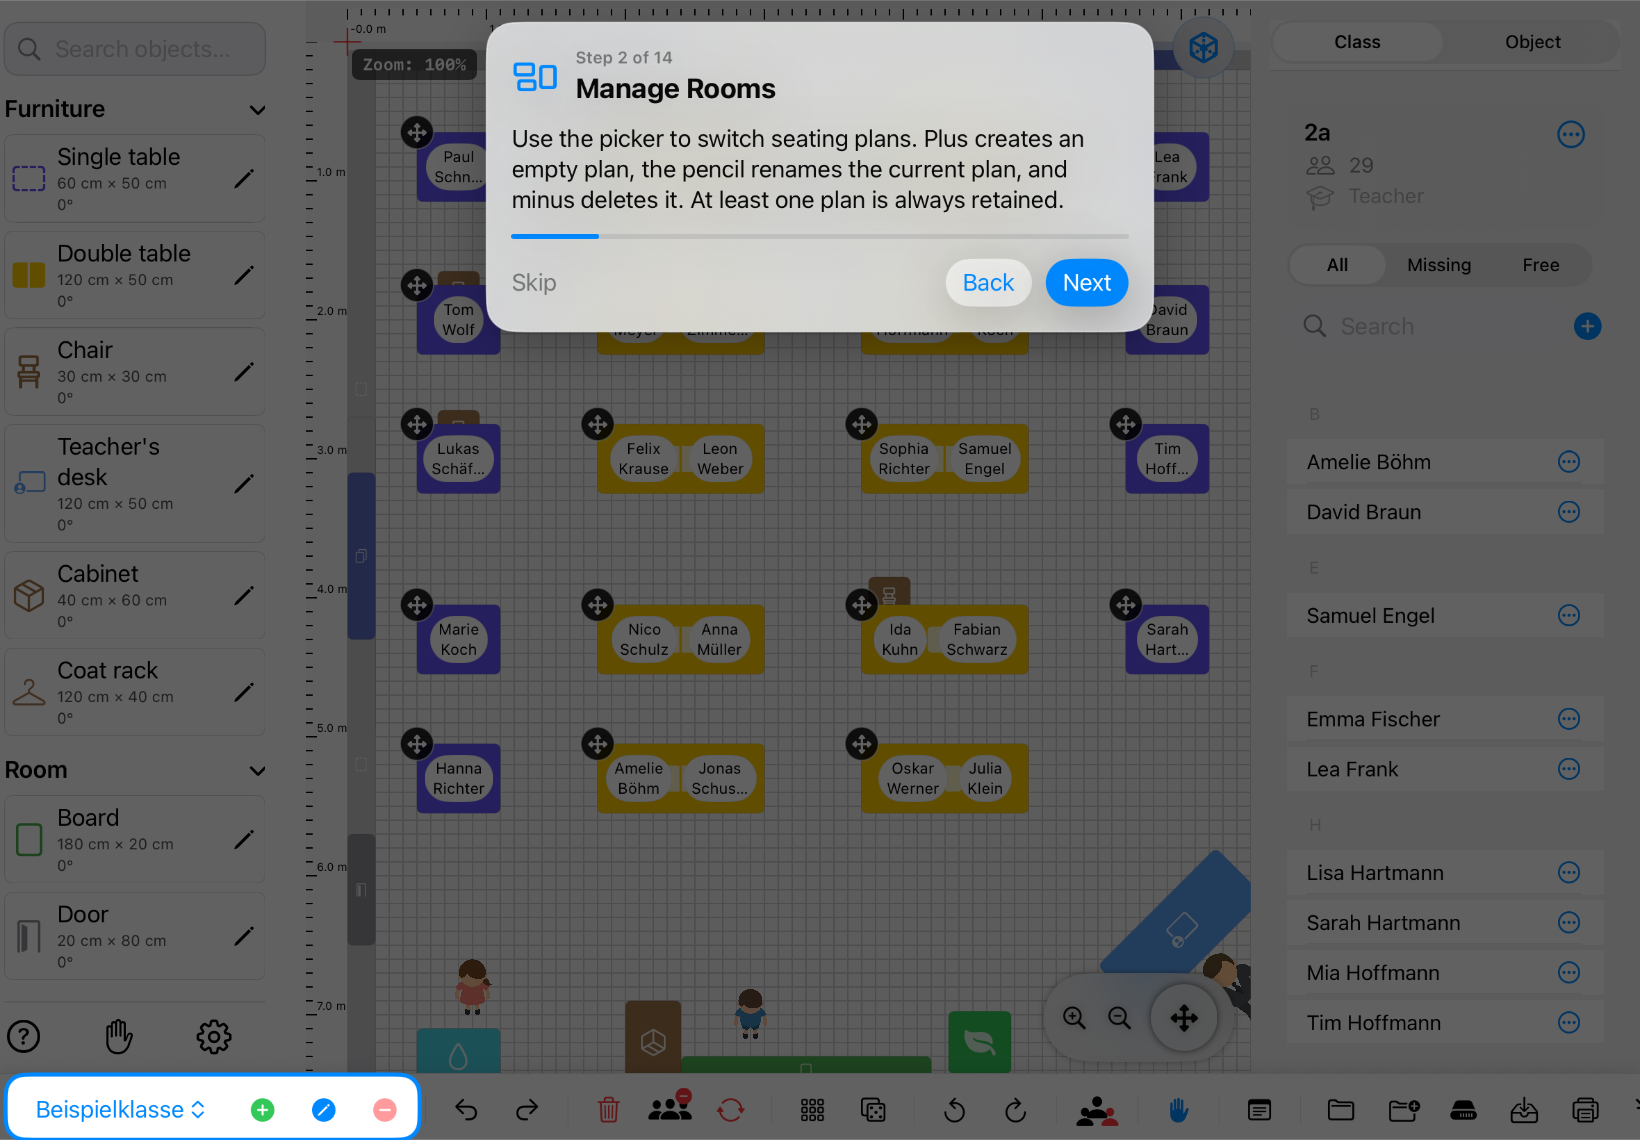
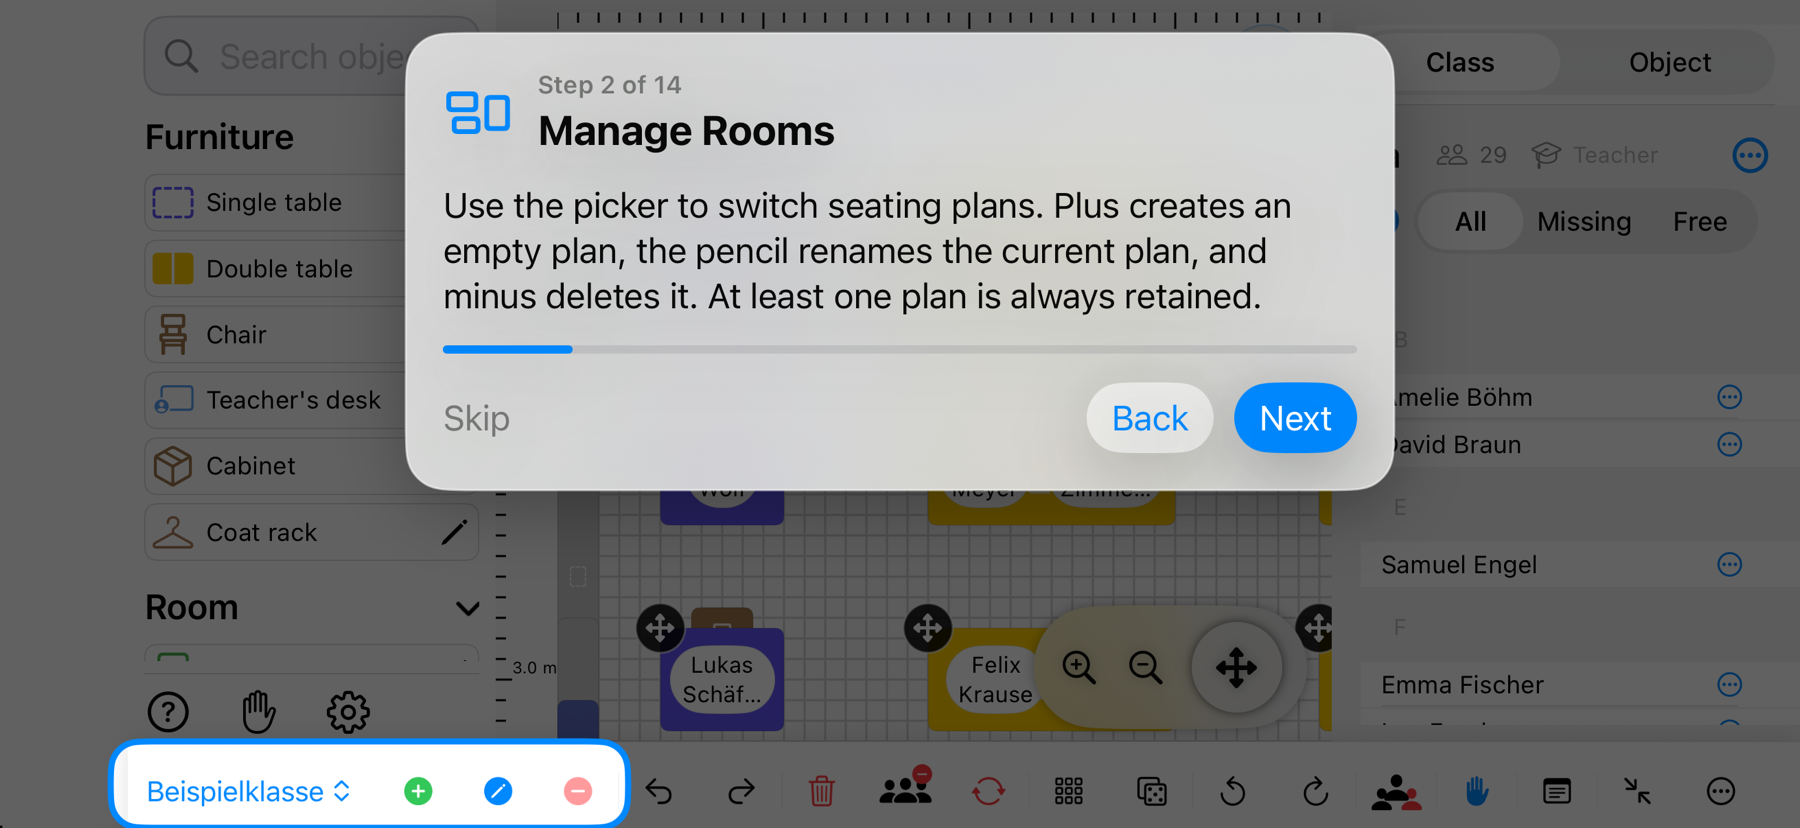
  1. Explore the example classOpen the included example class to see a realistic seating plan, room objects and student list right away.
  2. Create a planThe green plus creates an empty seating plan. Add the class and teacher names in the panel on the right.
  3. Rename a planTap the blue pencil next to the plan selector. The new name is saved with the room.
  4. Fill the student listAdd names individually or import a CSV, TSV, IServ or Untis list. You can review columns and order before importing.
  5. Delete a planThe red minus removes the current seating plan. The app always keeps at least one plan.
Classroom Planer in landscape with room selection, plus, rename and minus highlighted – iPad view
iPad screenshot in landscape · Version 8.7
Show the iPhone view
Classroom Planer in landscape with room selection, plus, rename and minus highlighted – iPhone view
iPhone screenshot in landscape · Version 8.7
Step 02

Set up the classroom

The object palette contains furniture and room elements. Place every item on the grid and adapt it to the real classroom.
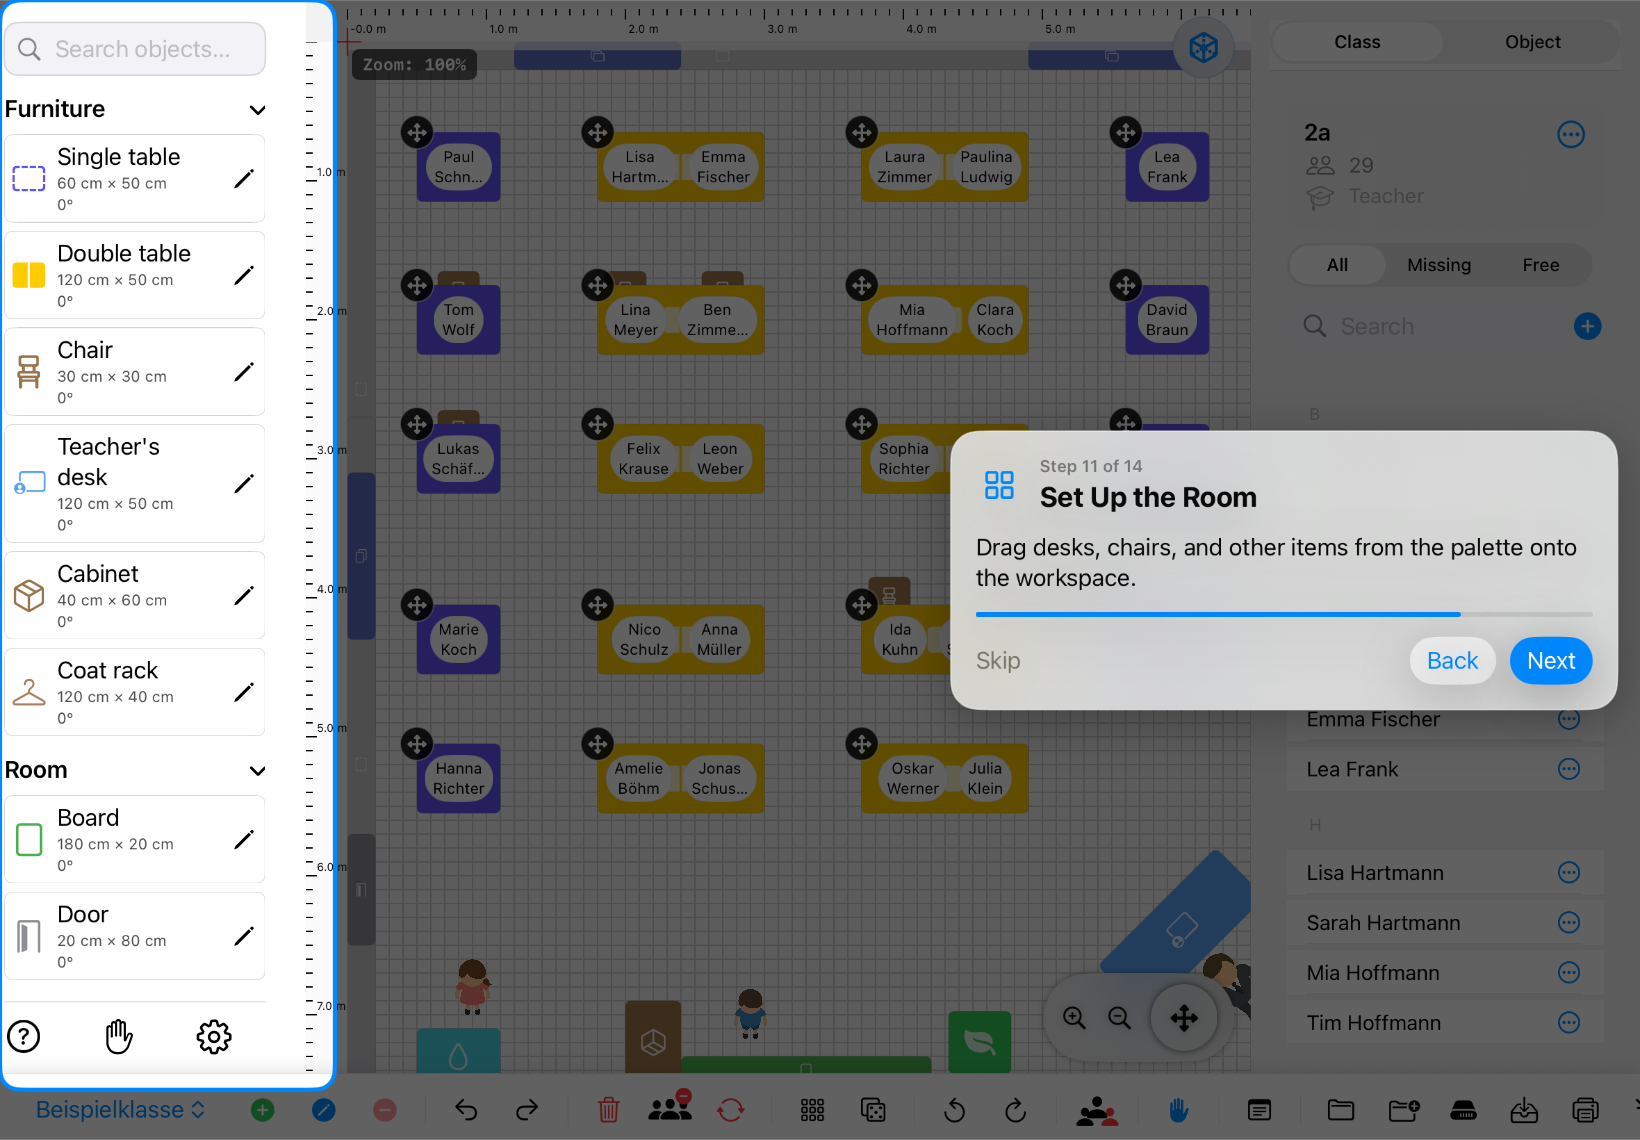
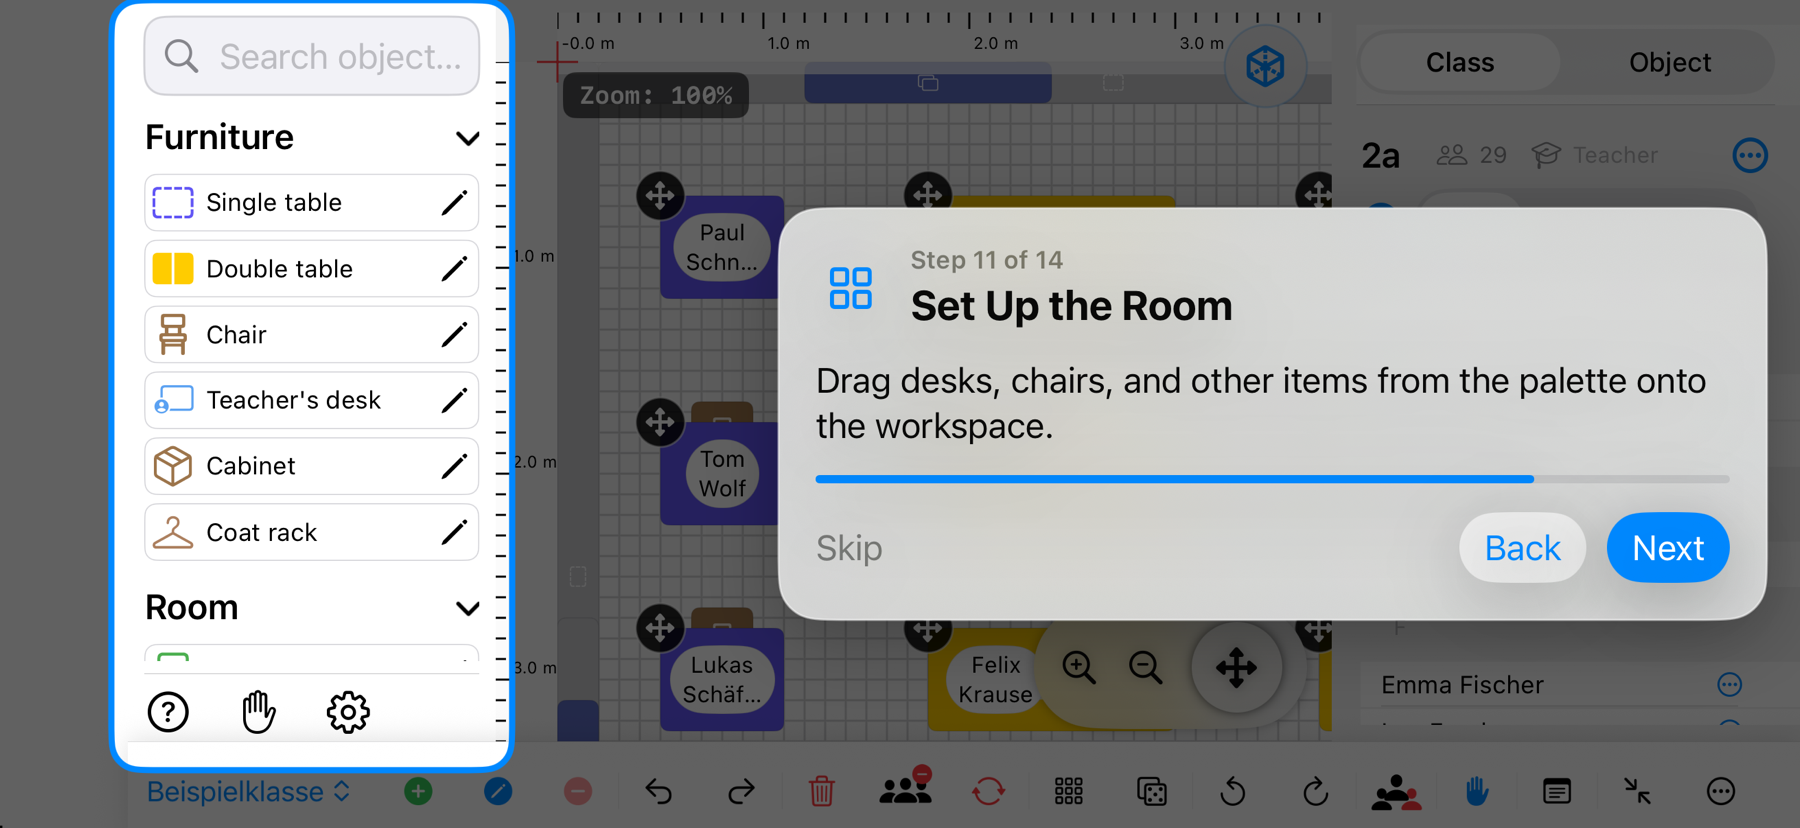
  1. Find an objectBrowse the Furniture and Room categories or search for a specific object.
  2. Drag it onto the gridDrag a desk, chair, coat rack, board, door or another element from the palette onto the canvas.
  3. Adjust its dimensionsUse the pencil to change the width, depth, colour and rotation of a template object.
  4. Try layouts safelyUndo and Redo in the new bottom toolbar let you test different arrangements without losing earlier steps.
Classroom Planer in landscape with the desks, chairs and room object palette highlighted – iPad view
iPad screenshot in landscape · Version 8.7
Show the iPhone view
Classroom Planer in landscape with the desks, chairs and room object palette highlighted – iPhone view
iPhone screenshot in landscape · Version 8.7
Step 03

Use the canvas and seating plan

Move, rotate and resize objects on the measured grid. Zoom and pan controls keep larger rooms easy to manage.
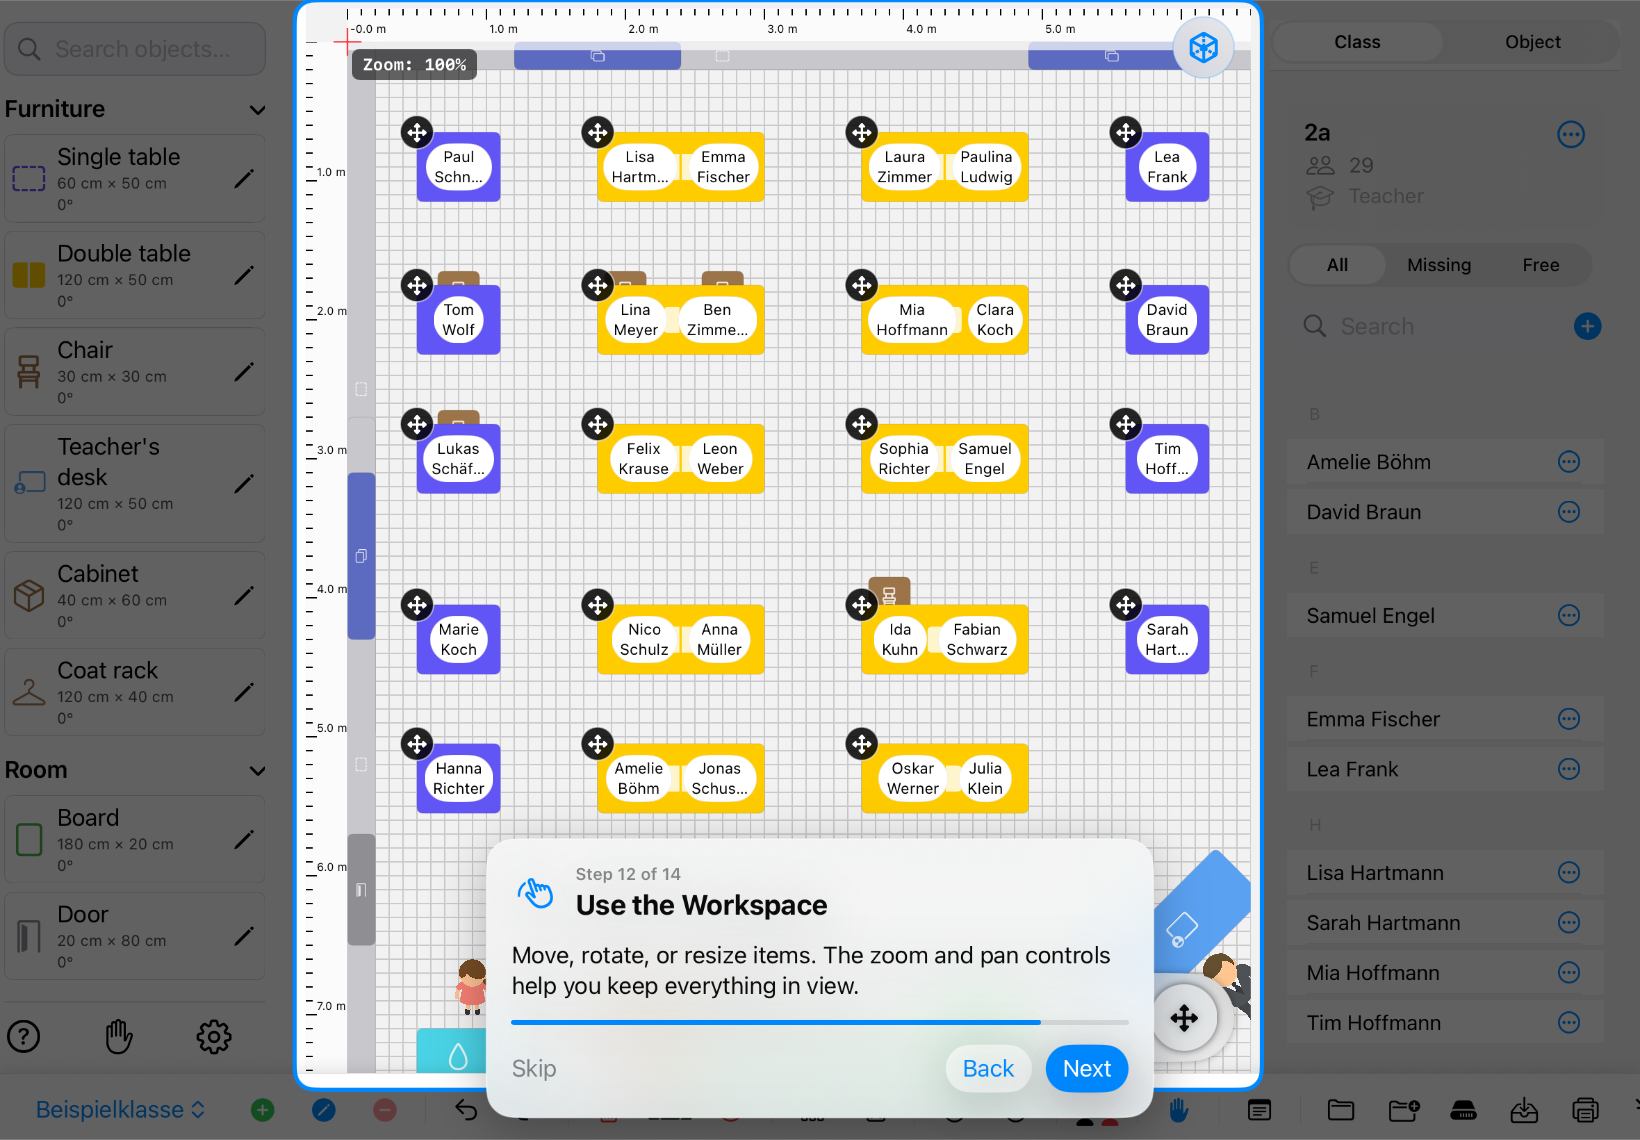
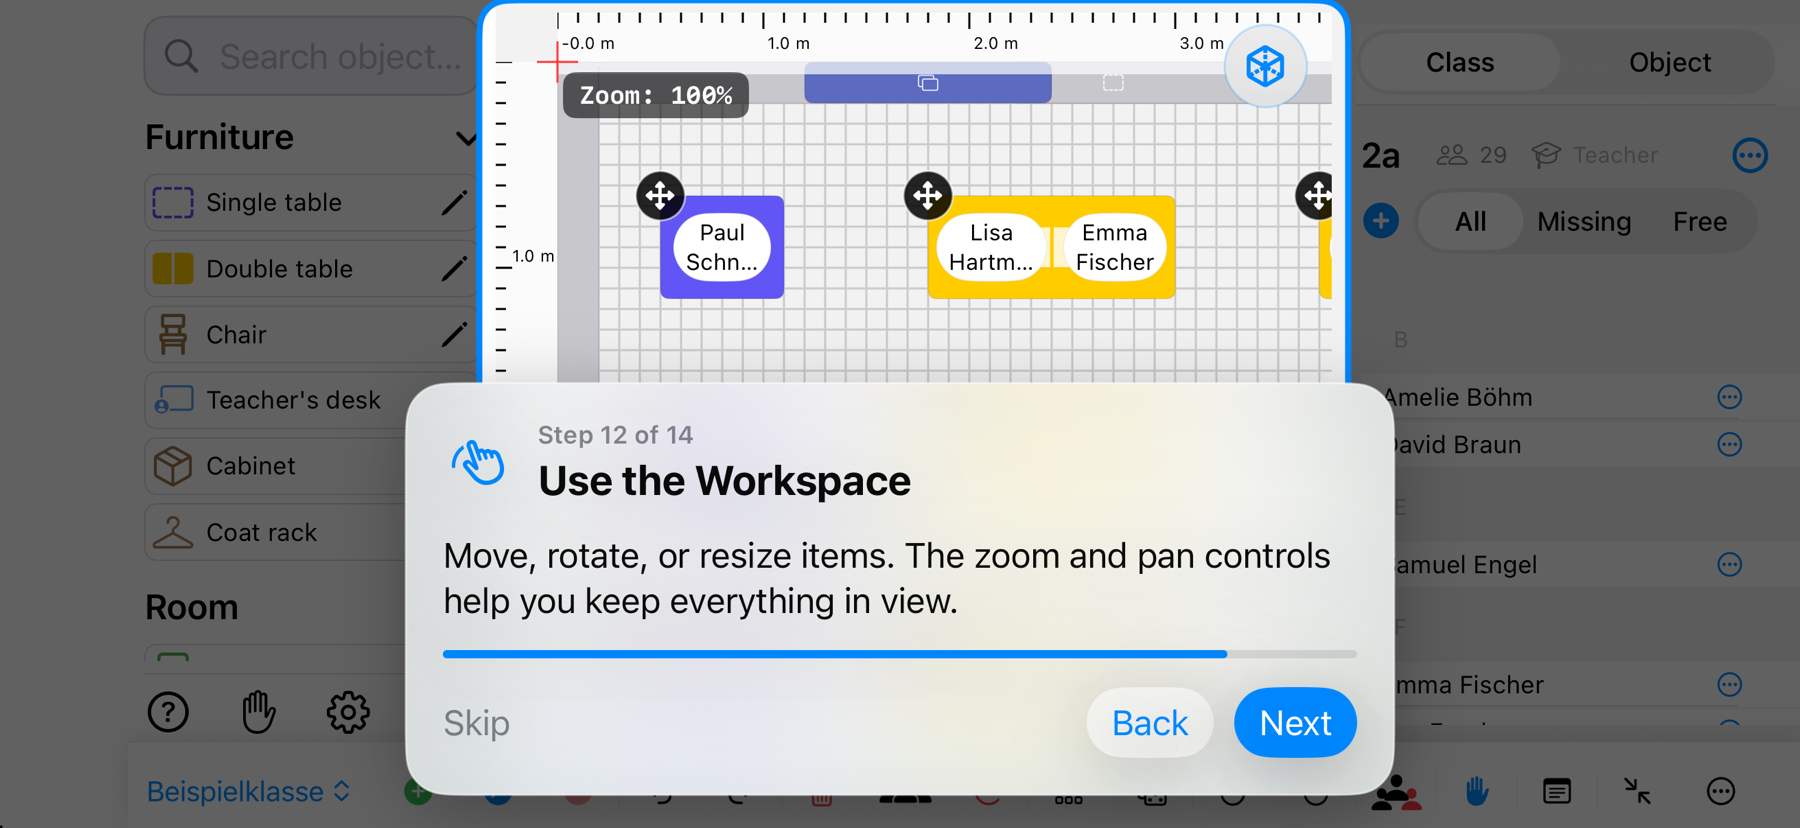
  1. Select an objectTap an object, drag it to the required position, then adjust its size or angle.
  2. Move the viewTurn on the hand tool to pan across the room without moving any furniture.
  3. Zoom in and outEnlarge details or zoom out until the complete room is visible.
  4. Tidy the planDelete selected elements one at a time or reset the room when you want to start again.
Classroom Planer in landscape with the grid canvas, zoom and 3D button highlighted – iPad view
iPad screenshot in landscape · Version 8.7
Show the iPhone view
Classroom Planer in landscape with the grid canvas, zoom and 3D button highlighted – iPhone view
iPhone screenshot in landscape · Version 8.7
Step 04

Assign students to seats

Once desks have seats, assign the class with drag and drop or let the app generate a new seating arrangement.
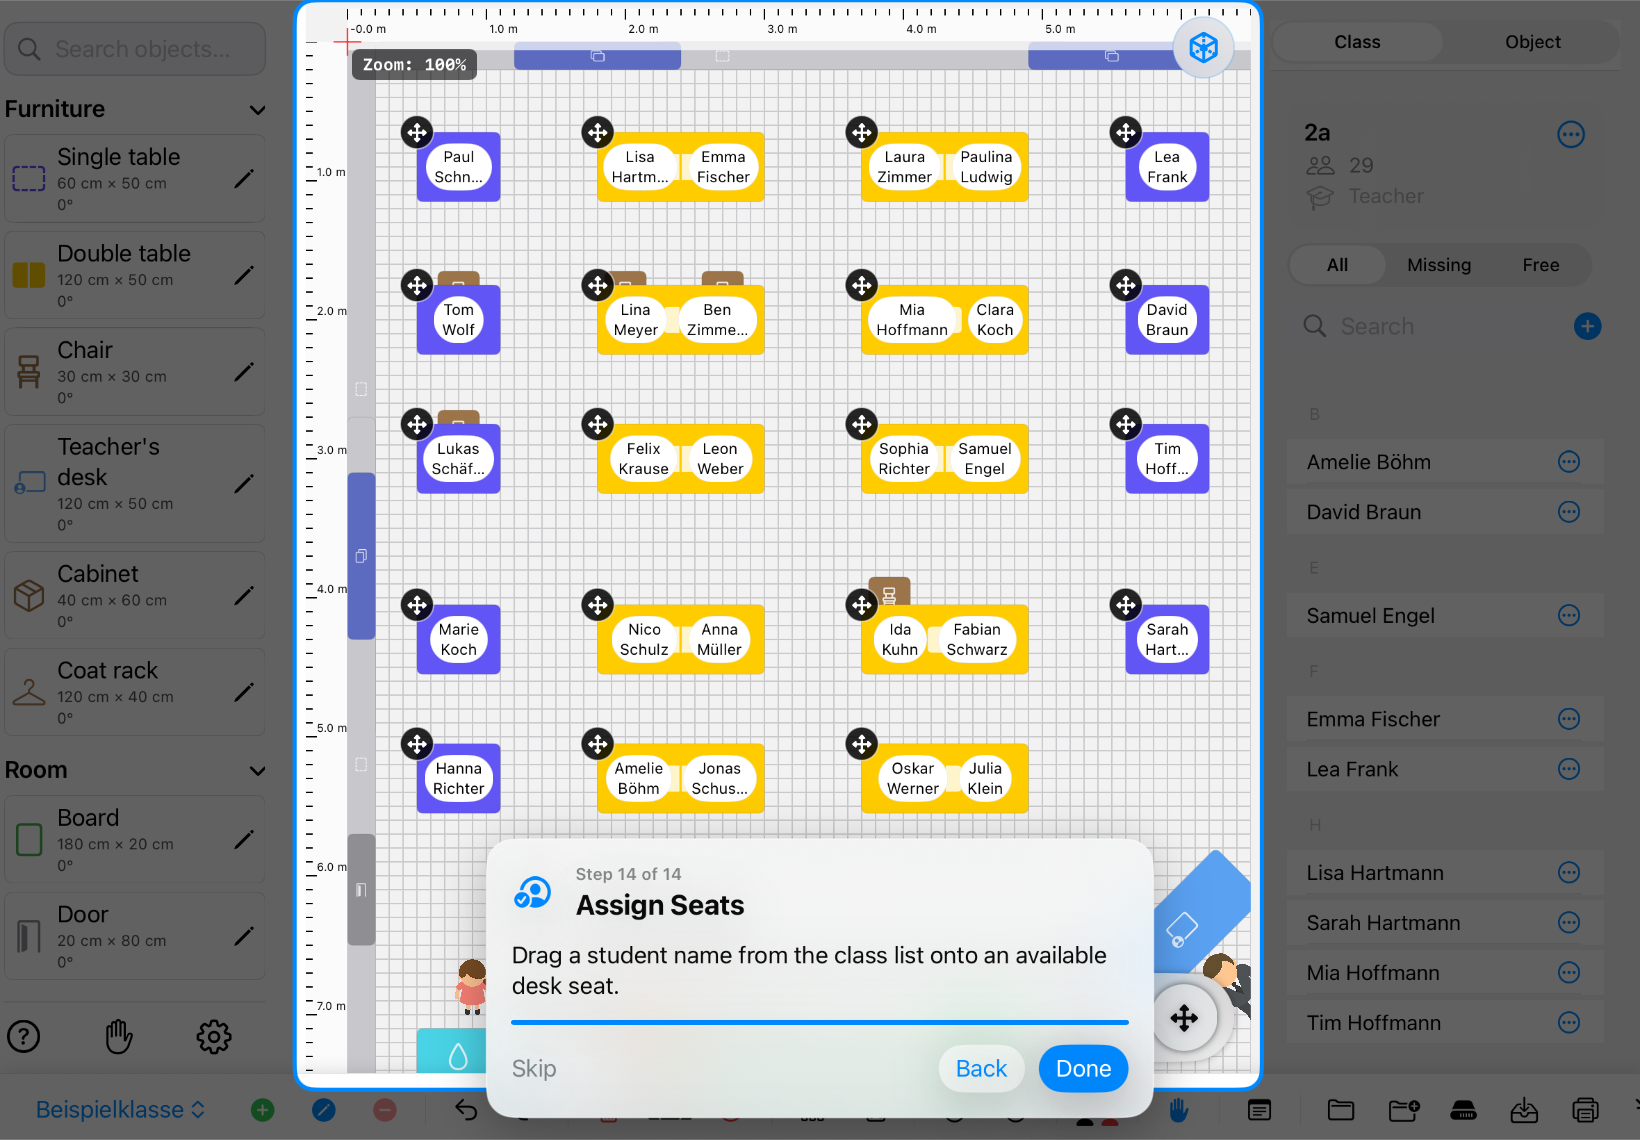
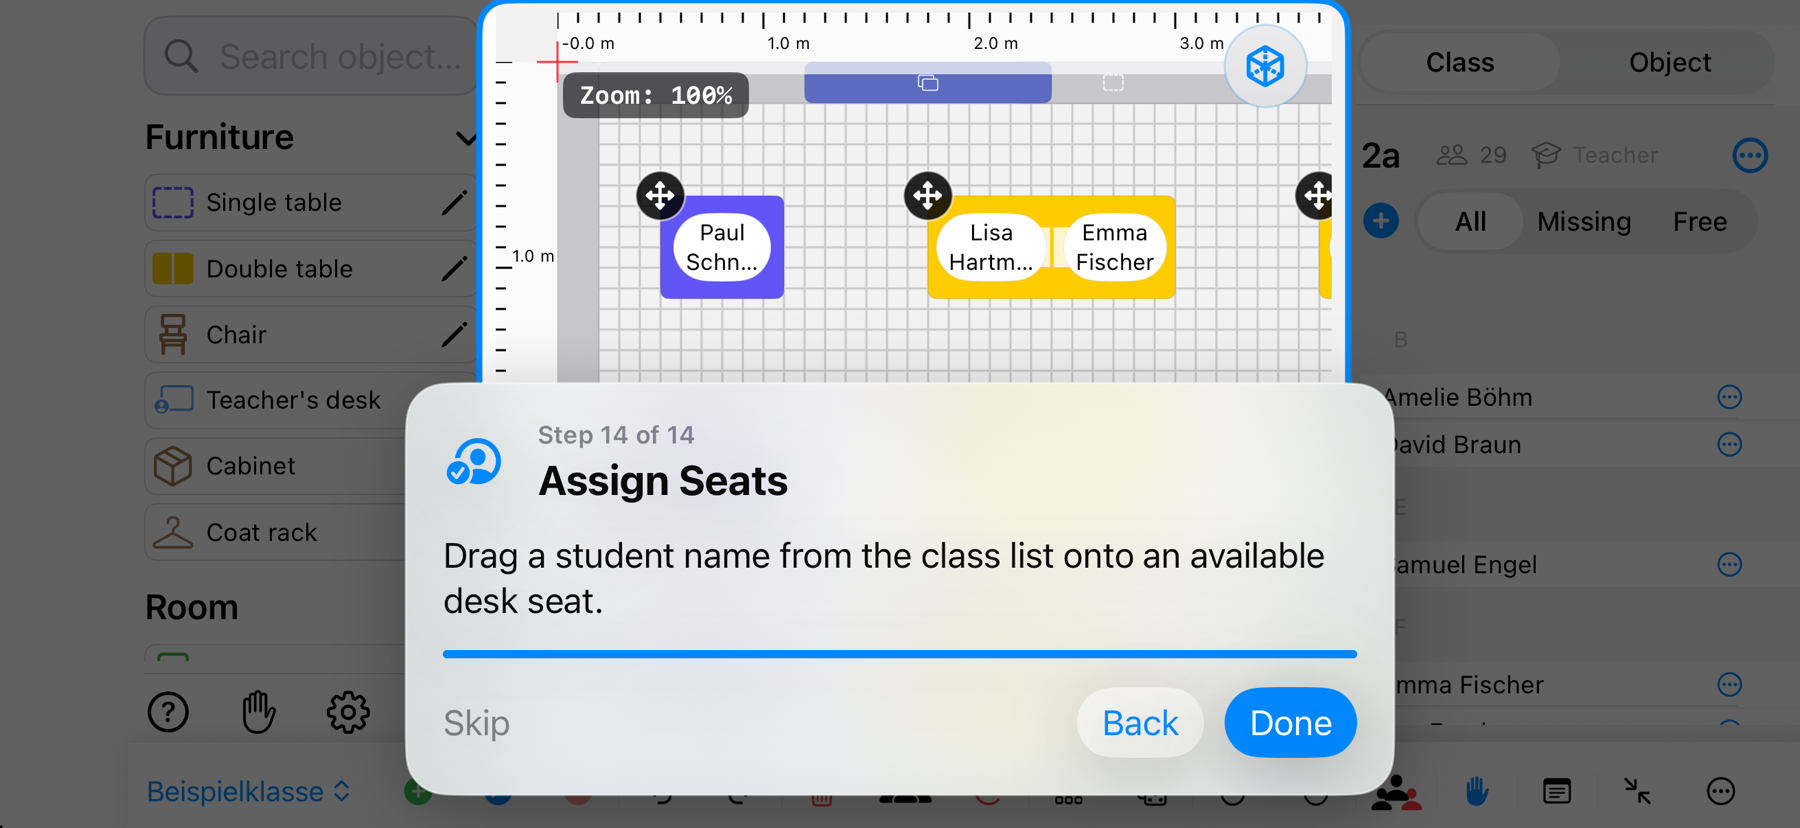
  1. Show unassigned namesSelect the Free filter on the right to see only students who do not yet have a seat.
  2. Assign a seatDrag a name from the class list onto a free place at a desk.
  3. Change the arrangementMove names between seats or remove an assignment.
  4. Randomise the classThe dice button redistributes everyone across the available seats. Undo the result if you want the previous arrangement back.
Classroom Planer in landscape showing free desk places and student seat assignment – iPad view
iPad screenshot in landscape · Version 8.7
Show the iPhone view
Classroom Planer in landscape showing free desk places and student seat assignment – iPhone view
iPhone screenshot in landscape · Version 8.7
Step 05

Record and review attendance

Attendance is stored by date. Start with everyone present or everyone absent, then change only the exceptions.
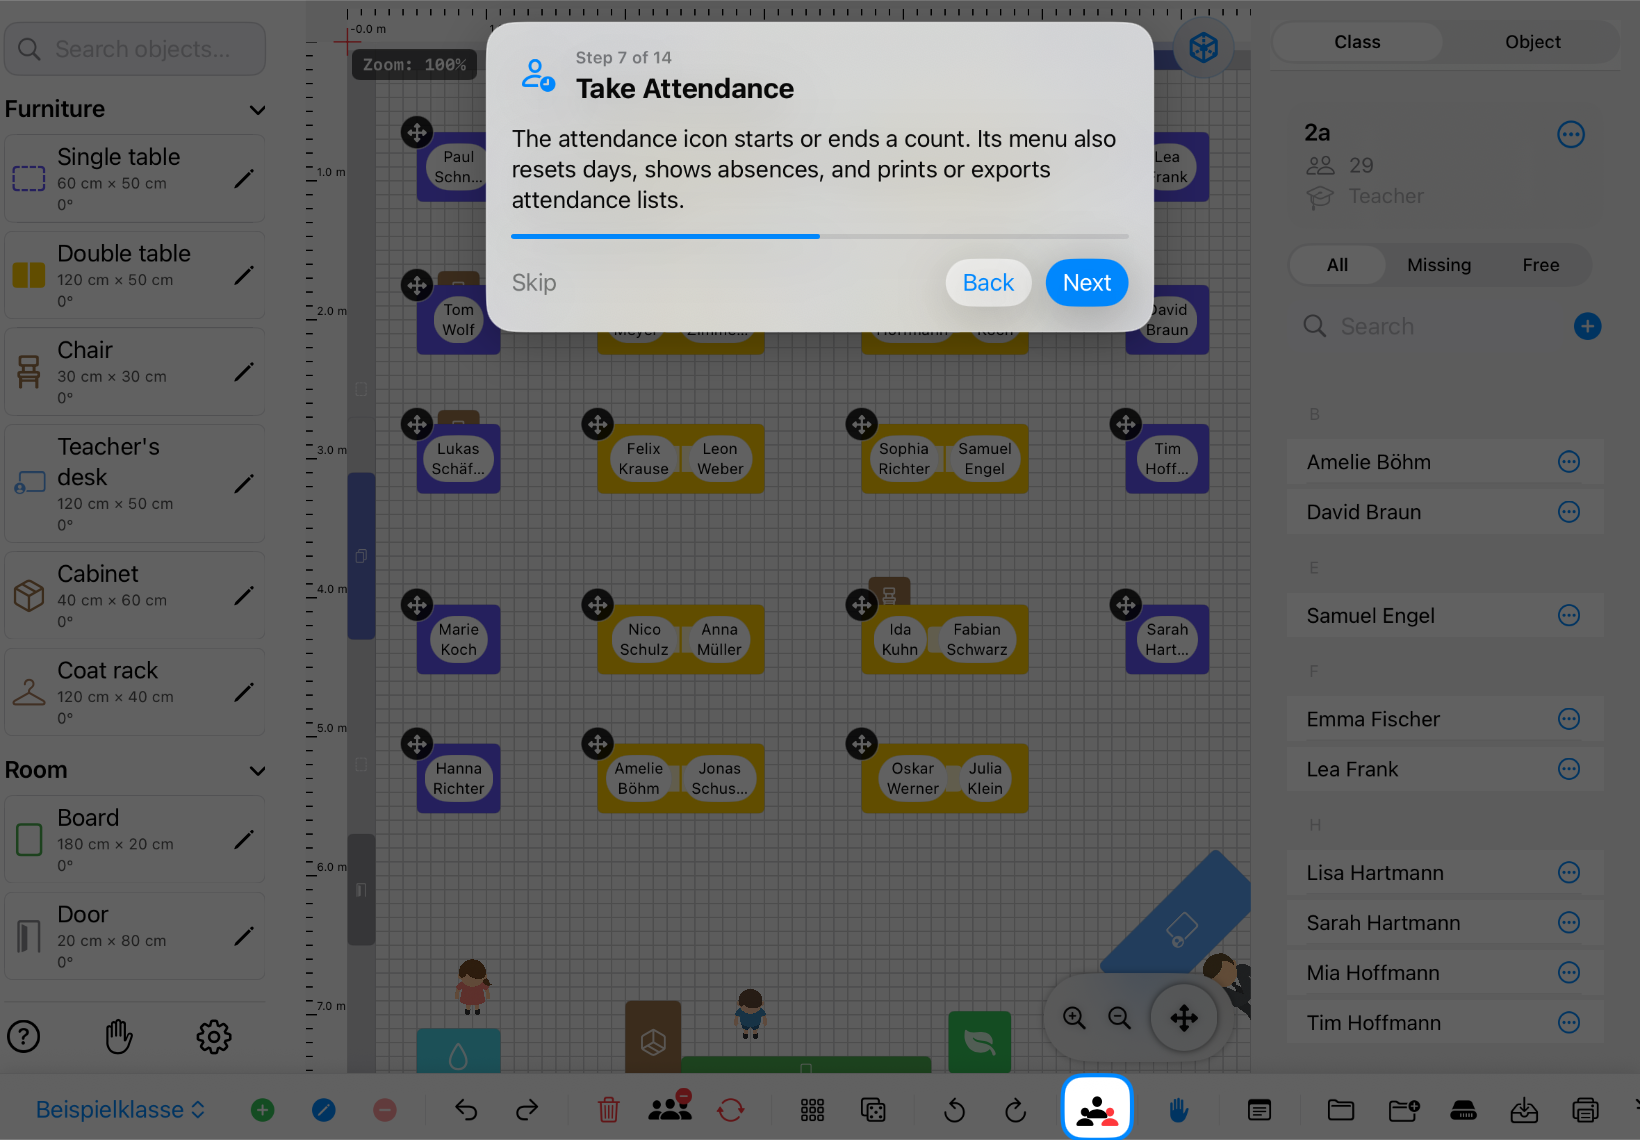
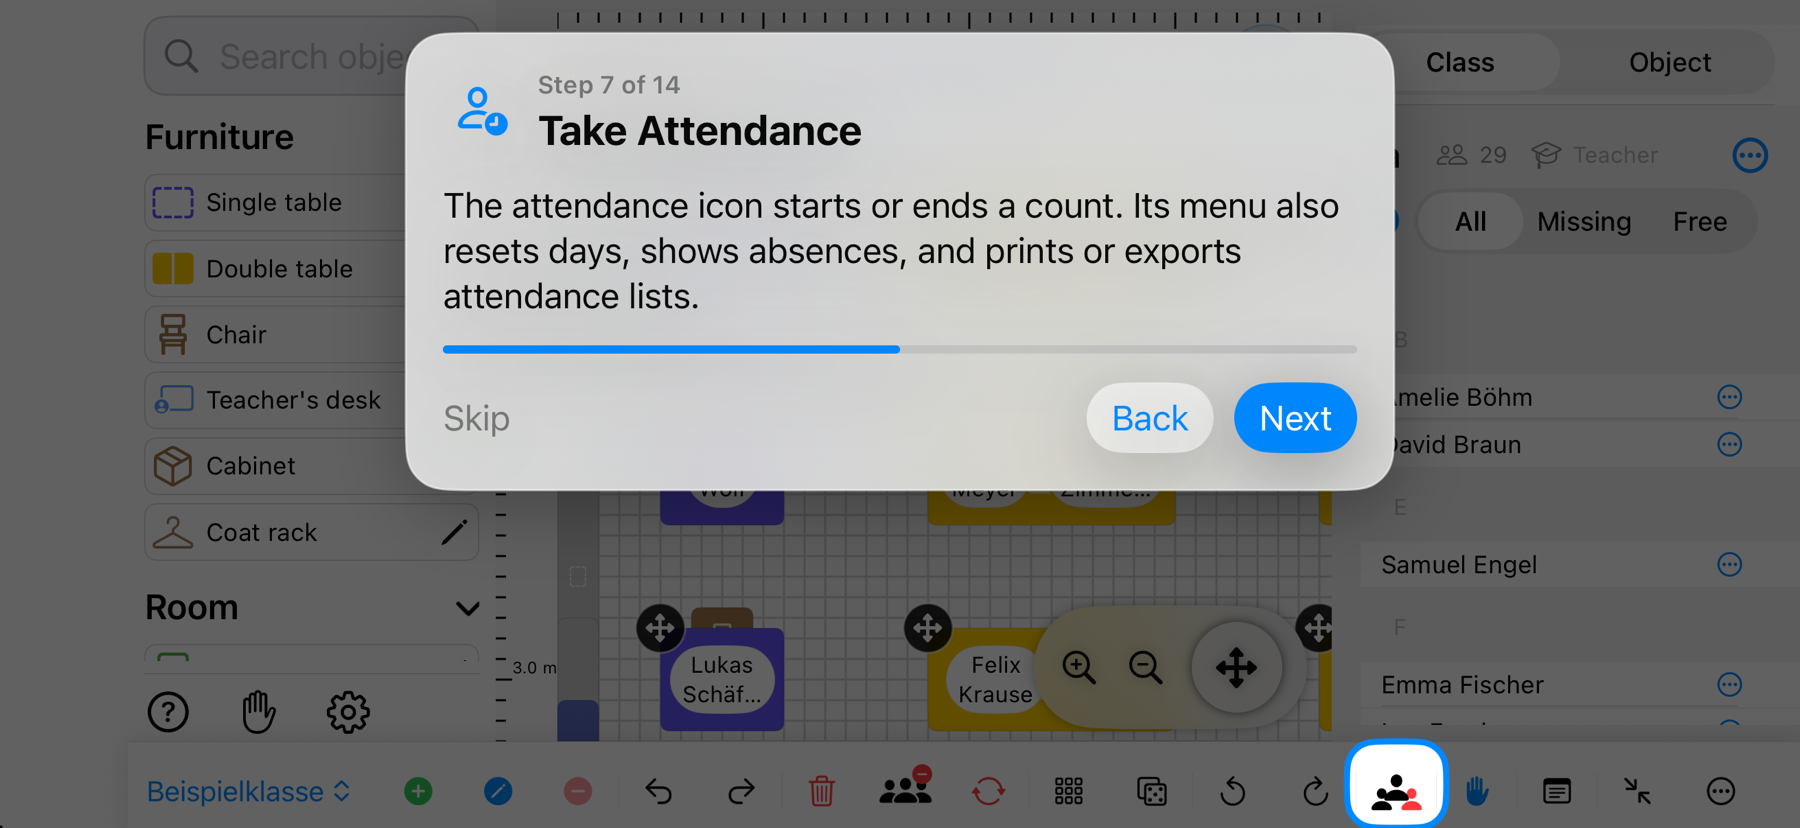
  1. Start a sessionTap the attendance icon and choose the most convenient starting mode for the current lesson.
  2. Change a statusTap a name in the seating plan or list to switch between present and absent.
  3. Finish the sessionComplete the count. The result is saved under the current date.
  4. Use absence recordsOpen earlier dates, distinguish excused and unexcused entries, then print or export the overview.
Classroom Planer in landscape with the attendance button highlighted – iPad view
iPad screenshot in landscape · Version 8.7
Show the iPhone view
Classroom Planer in landscape with the attendance button highlighted – iPhone view
iPhone screenshot in landscape · Version 8.7
Step 06

Document oral participation

Assess contributions on a scale from 0 to 5. Daily scores, assessment notes and long term summaries stay connected.
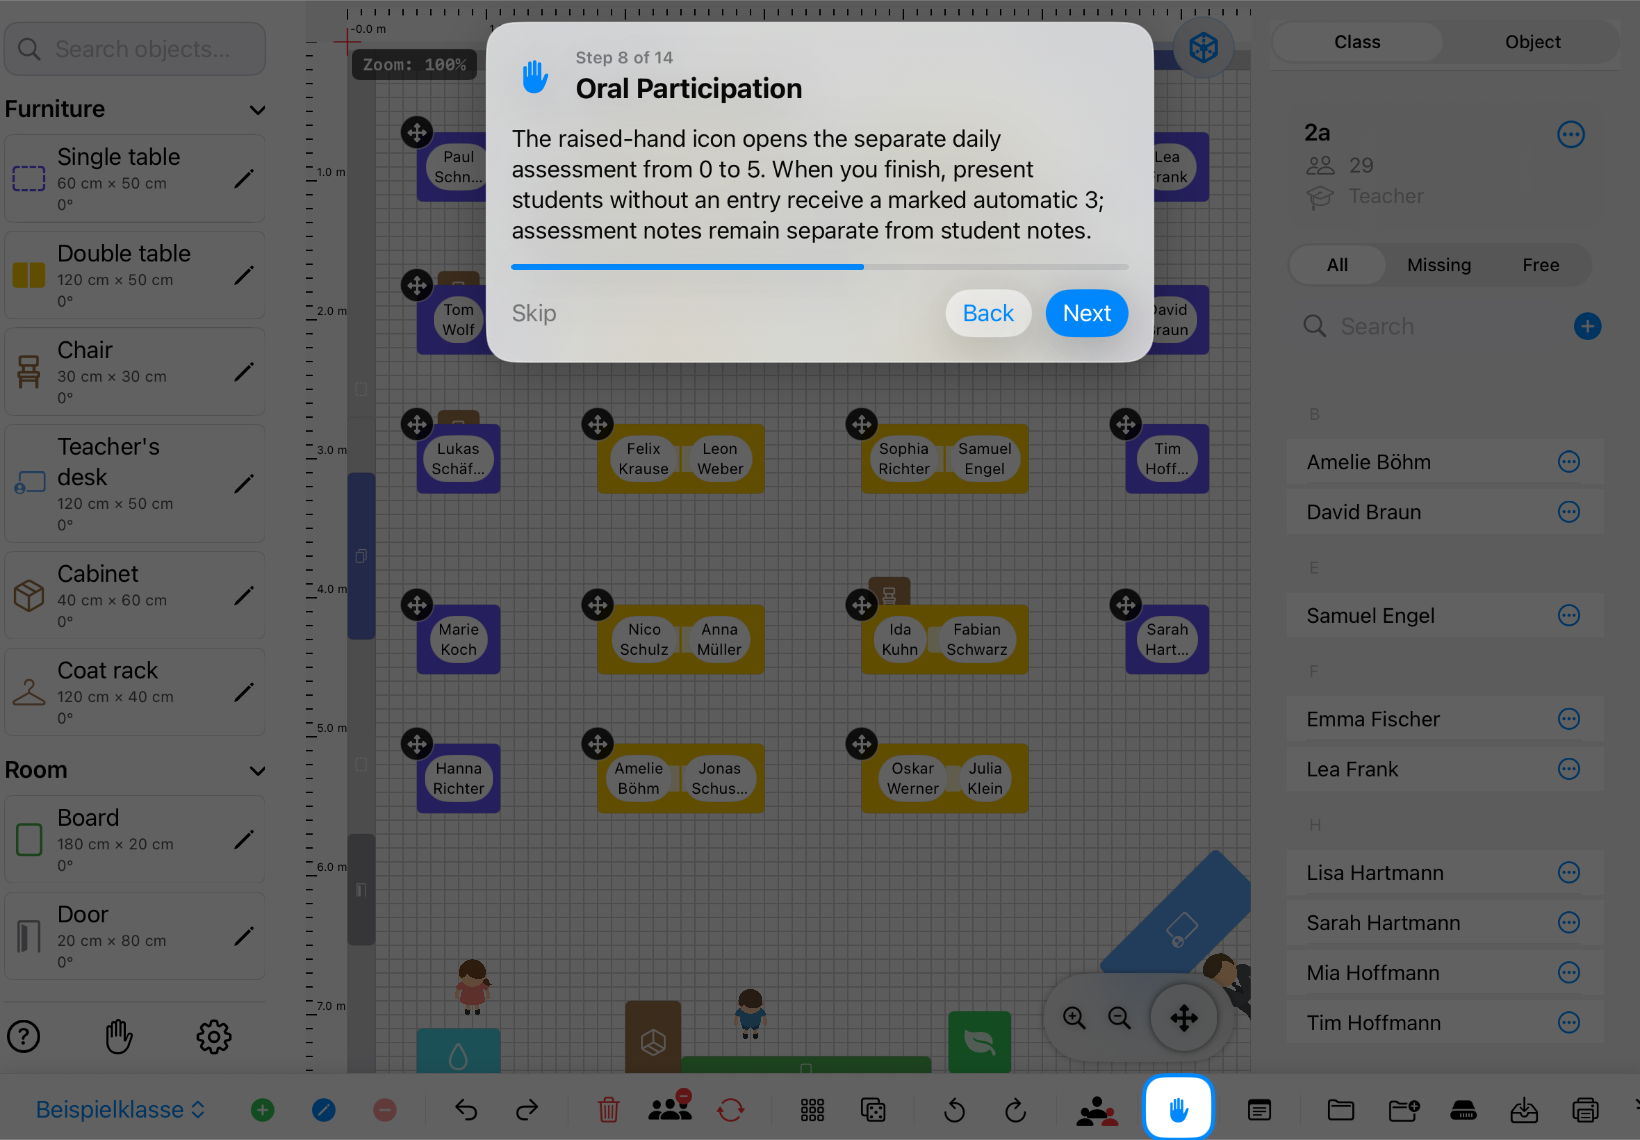
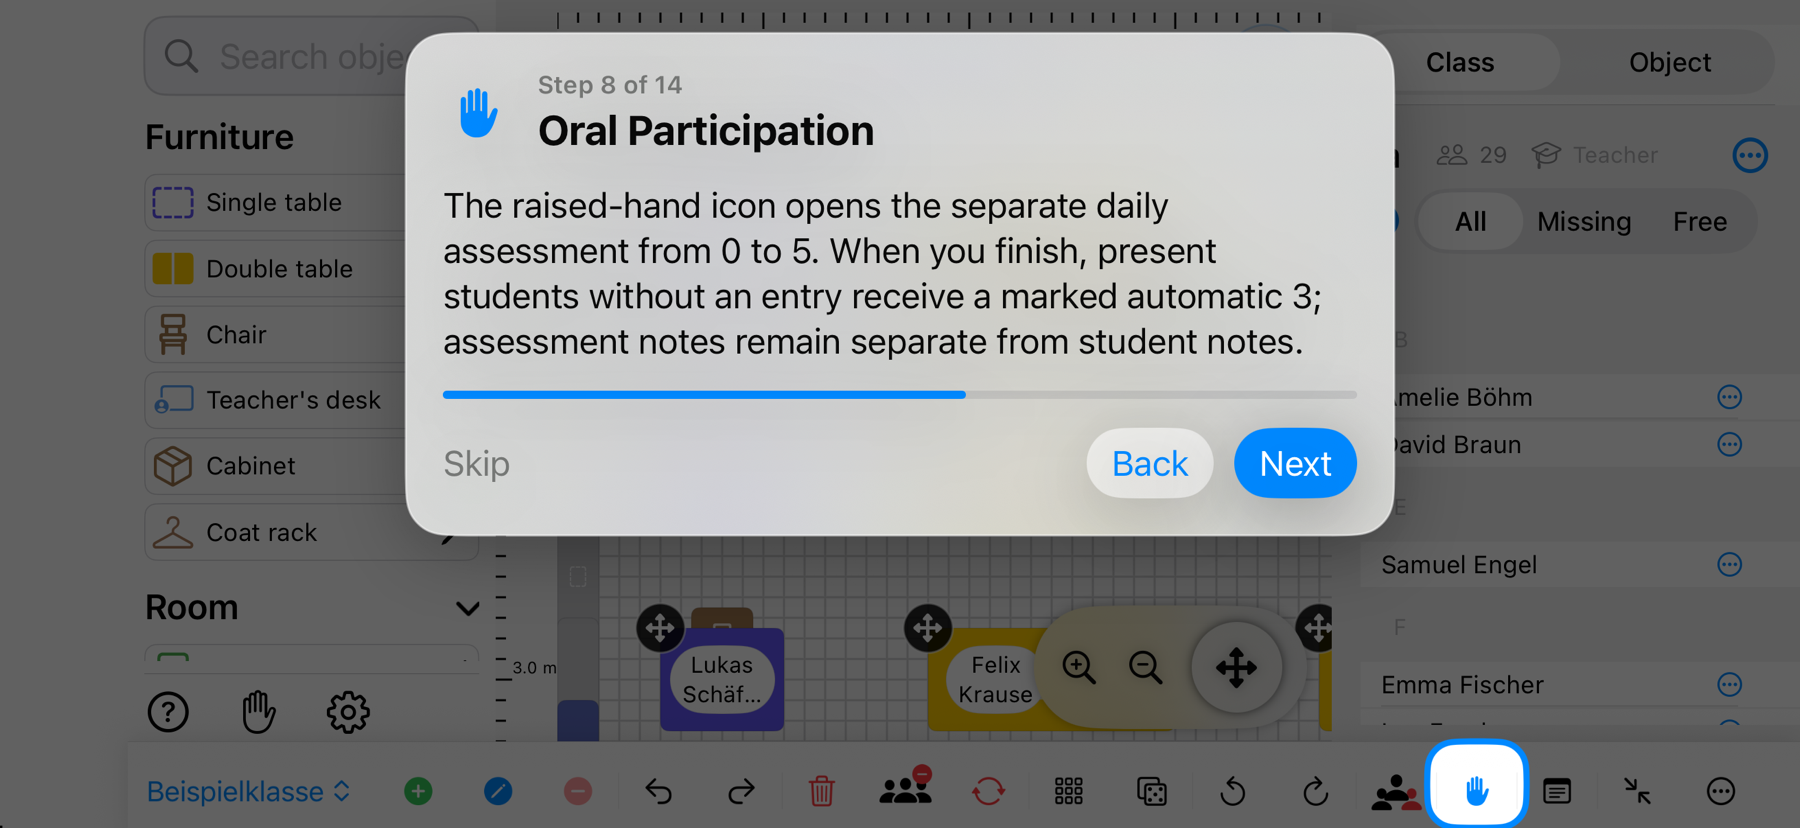
  1. Open assessmentTap the hand icon and begin a daily assessment for the current class.
  2. Enter a scoreChoose a value from 0 to 5 for a student and add a short assessment note when useful.
  3. Complete the sessionPresent students without a manual entry automatically receive a clearly marked score of 3.
  4. Review progressCompare average, trend and distribution for a period, then print or export the results.
Classroom Planer in landscape with the hand icon for oral participation highlighted – iPad view
iPad screenshot in landscape · Version 8.7
Show the iPhone view
Classroom Planer in landscape with the hand icon for oral participation highlighted – iPhone view
iPhone screenshot in landscape · Version 8.7
Step 07

Keep student notes separate

Ongoing notes about individual students are stored separately from assessment notes, keeping observations and performance records clearly organised.
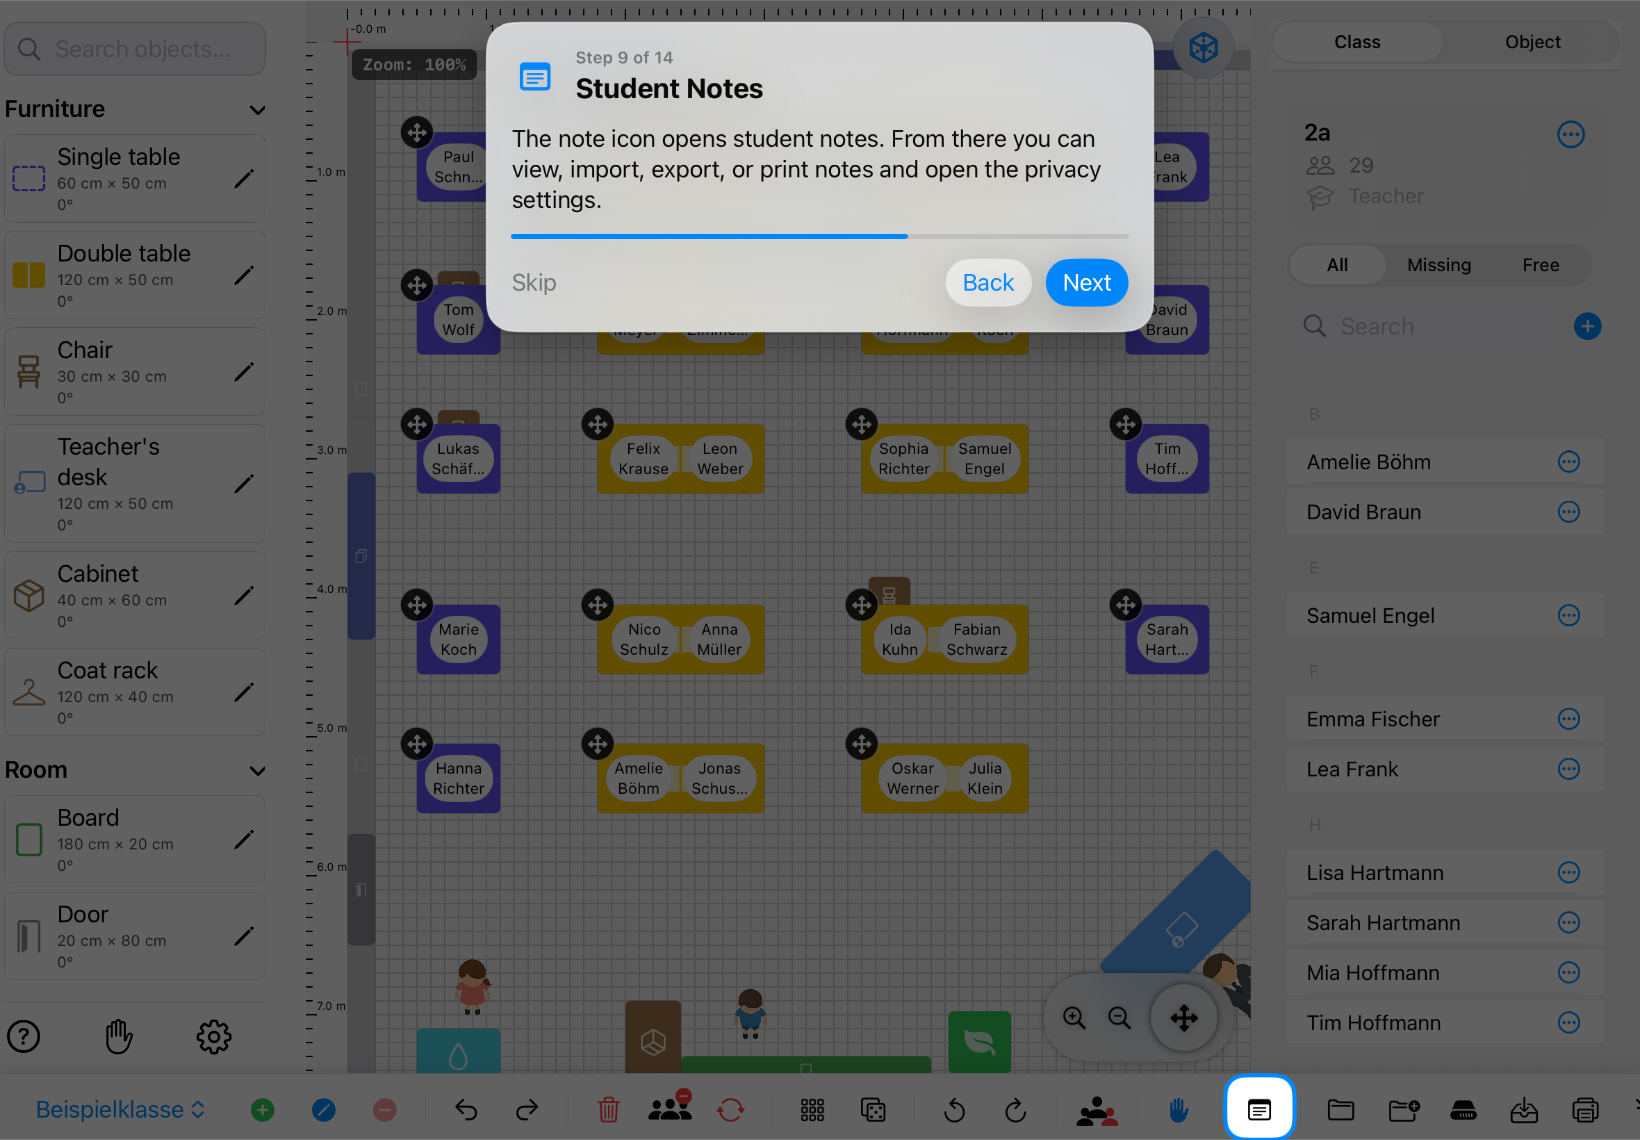
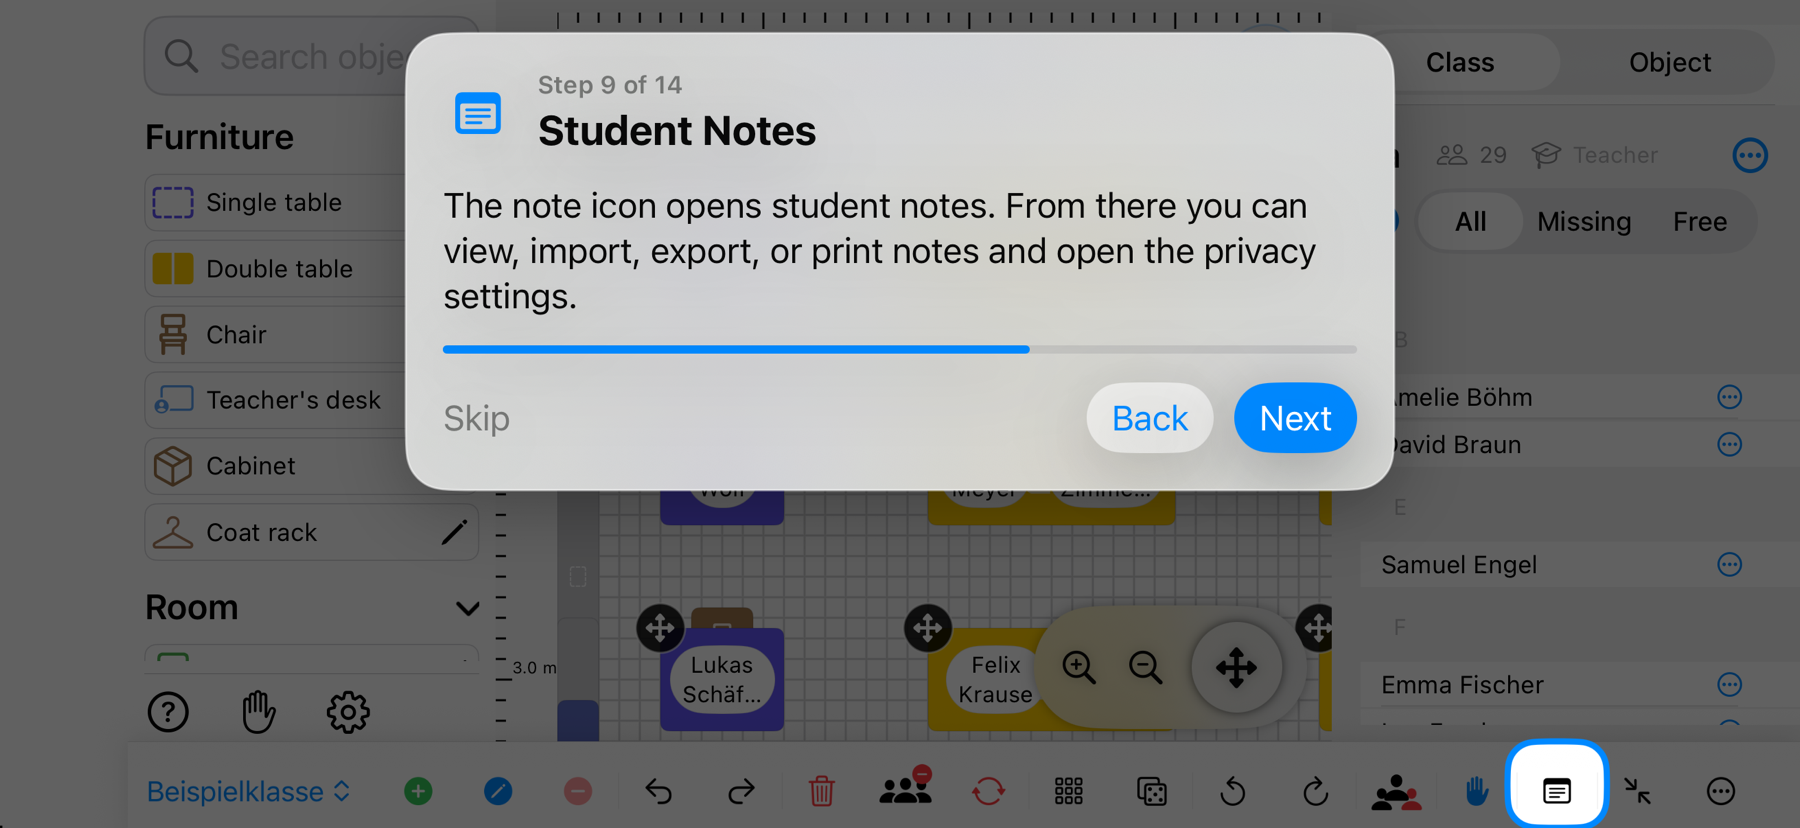
  1. Open student notesTap the note icon to see all existing notes in a dedicated overview.
  2. Add an entrySelect a student, write the note and use symbols or colours for quick orientation.
  3. Exchange dataImport or export notes only when you need them on another device or in a backup.
  4. Control privacyUse the settings to decide which personal content may be printed or exported.
Classroom Planer in landscape with the student notes icon highlighted – iPad view
iPad screenshot in landscape · Version 8.7
Show the iPhone view
Classroom Planer in landscape with the student notes icon highlighted – iPhone view
iPhone screenshot in landscape · Version 8.7
Step 08

Save, load, print and check in 3D

Version 8.7 saves more reliably: choose a storage folder, update the linked file and keep an additional local backup.
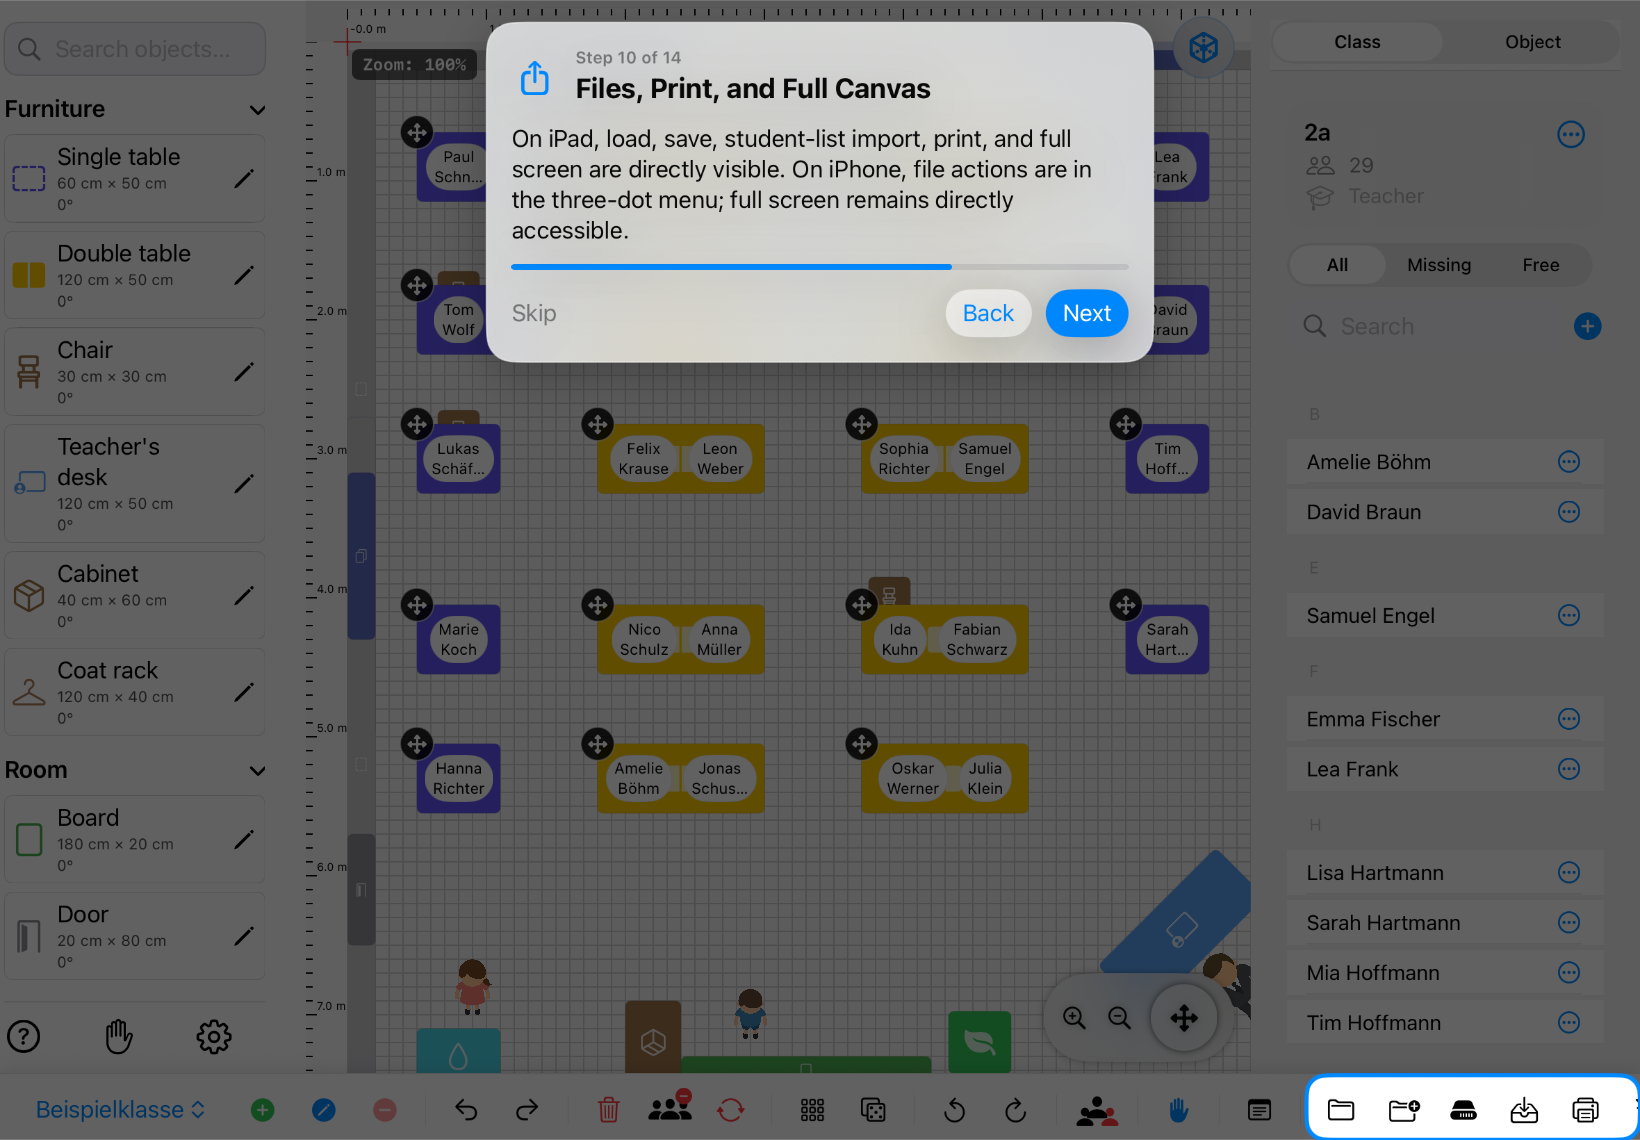
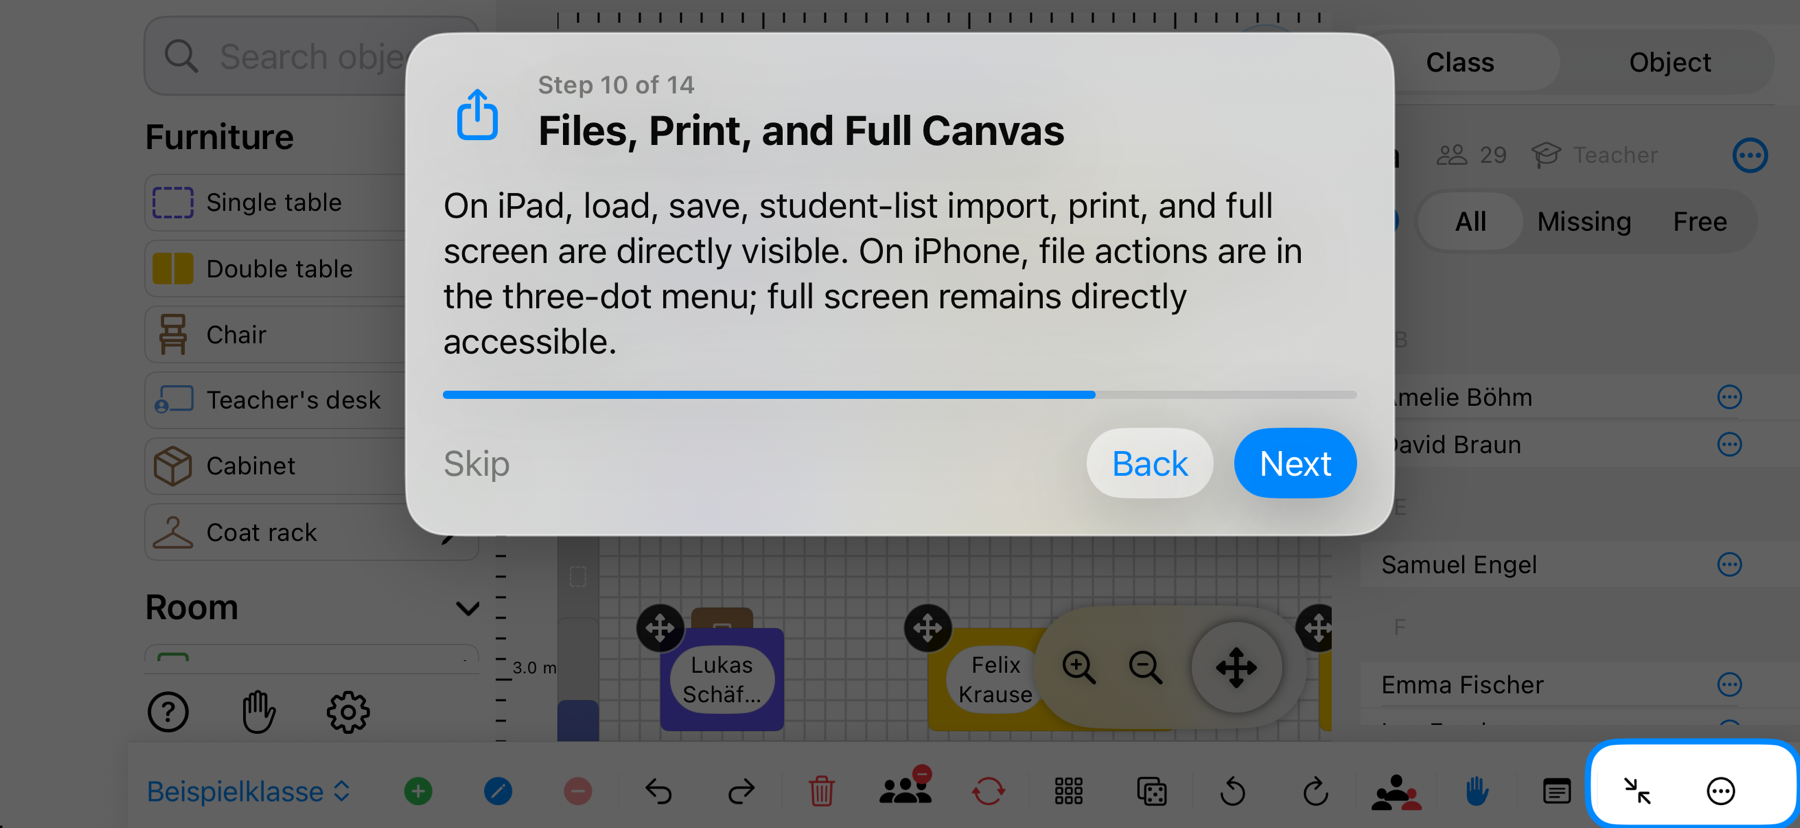
  1. Choose a storage folderOpen the three-dot menu and select where Classroom Planer should keep its file, either locally or in a cloud folder you choose.
  2. Save changes safelySave updates the linked file. The app also maintains a local backup in case external storage is temporarily unavailable.
  3. Load an existing planOpen a saved Classroom Planer file and continue with its room, class, seating arrangement and records.
  4. Print and check in 3DUse the improved print options or tap the cube to open the spatial view, reframe the camera and print it when needed.
Classroom Planer in landscape with load, save, print and full screen controls highlighted – iPad view
iPad screenshot in landscape · Version 8.7
Show the iPhone view
Classroom Planer in landscape with load, save, print and full screen controls highlighted – iPhone view
iPhone screenshot in landscape · Version 8.7

Current in version 8.7

Inspect the room in three dimensions.

The 3D preview uses the furniture, walls, people and positions from the plan. Switch the rendering style from the palette, show names and notes, reframe the camera and print the current view.
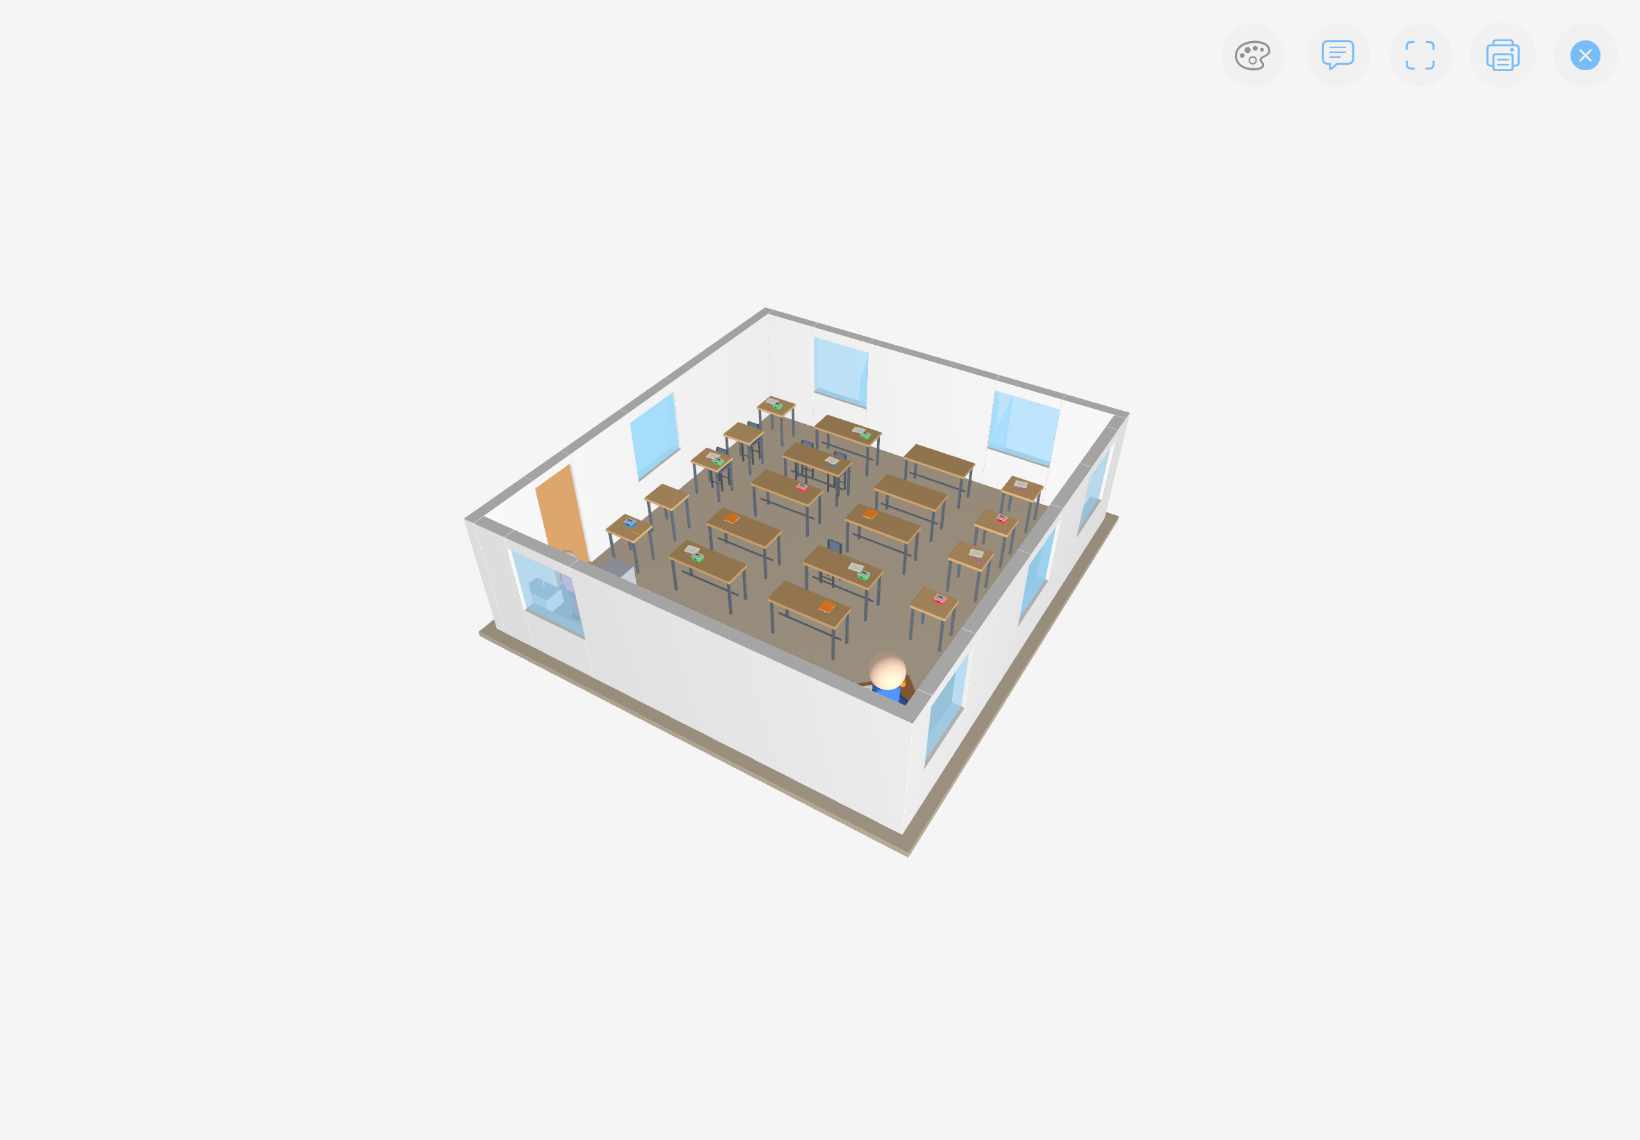
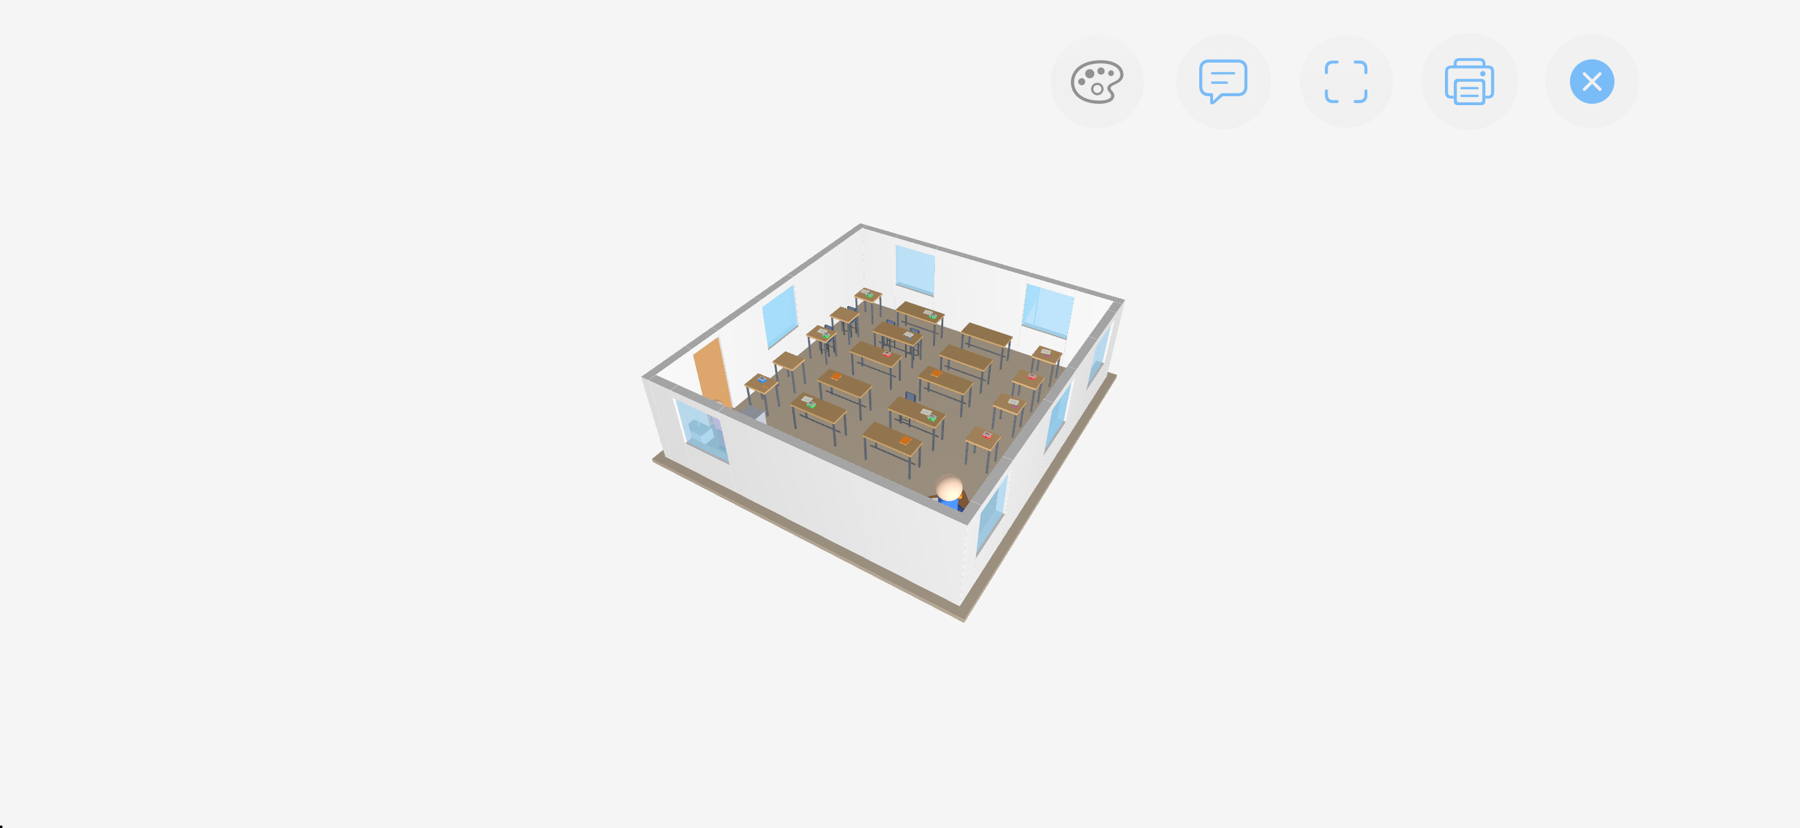
  • Open the cube button on the canvas
  • Rotate the view and check the framing
  • Change rendering style with the palette button
  • Show labels or print the current view
Current 3D preview of a classroom on iPad in landscape
iPad: The example class in Classroom Planer 8.7's 3D view
Show the 3D view on iPhone
Current 3D preview of a classroom on iPhone in landscape
iPhone screenshot in landscape · Version 8.7

Inside the app

Open the guide again at any time.

Tap the question mark at the bottom left. The guided tour highlights rooms, tools, attendance, participation, notes, files, palette, canvas, student list and seat assignment one after another.

Open the matching videos

Personal data

You choose where files are stored.

Classes, seating plans, attendance, assessments and notes are processed without a developer server. Version 8.7 saves to a folder you choose or to the linked file and keeps an additional local backup. This website does not request student data. Information is shared only when you export files or place them in a cloud folder yourself.